RAG: Seamlessly Integrating Context from Multiple Sources into Delta Tables in Databricks
Feb 6, 2025
Authors

Knowledge is power, but only when it's accessible. In today's data-driven world, crucial information is often fragmented across a myriad of data storage platforms and business tools: blob storage, company's wiki, Google Drive, Dropbox, Slack, etc. Each system has its own unique authentication methods, data formats, access patterns and quirks - making it a challenge to bring this collective intelligence into a RAG application effectively.
With Unstructured Platform, you can connect to most enterprise systems, ingest the data, preprocess it in a standardized manner to deliver RAG-ready embedded chunks into a destination of your choice.
In this tutorial, we'll use Amazon S3 and Google Drive as data sources, and we'll show how you can seamlessly process documents from these sources, store the results in a Delta Table in Databricks, and build RAG over this data.
Prepare the data
To start transforming your data with Unstructured, contact us to get access—or log in if you're already a user.
In this tutorial, our data will consist of a few annual 10-K SEC filings from Walmart, Kroeger, and Costco for the 2023 fiscal year. These reports offer a deep insight into each company's financial performance that year.
The documents are originally in PDF format, two of them are stored in a Google Drive folder, and one more is in an Amazon S3 bucket. After preprocessing, we'll store the document chunks with their embeddings in a Delta Table in Databricks for retrieval. Here is what we need to do to prepare the data:
1) Create an S3 source connector in Unstructured Platform to connect it to the documents stored in the Amazon S3 bucket
2) Create a Google Drive source connector in Unstructured Platform to connect it to the documents in a specified Google Drive folder
3) Set up a Delta Table in Databricks which we will use to write the processed documents into
4) Create a Delta Table in Databricks destination connector in Unstructured Platform to upload the processed documents
5) Create a workflow that starts with ingestion of the documents from the source connectors, then adds data transformation steps (such as extracting content of the PDFs, enriching the documents with metadata, chunking the text, and generating embedding vectors for the similarity search), and then ends with uploading the results into the destination.
Let's go over these steps in detail.
Create an S3 source connector in Unstructured Platform
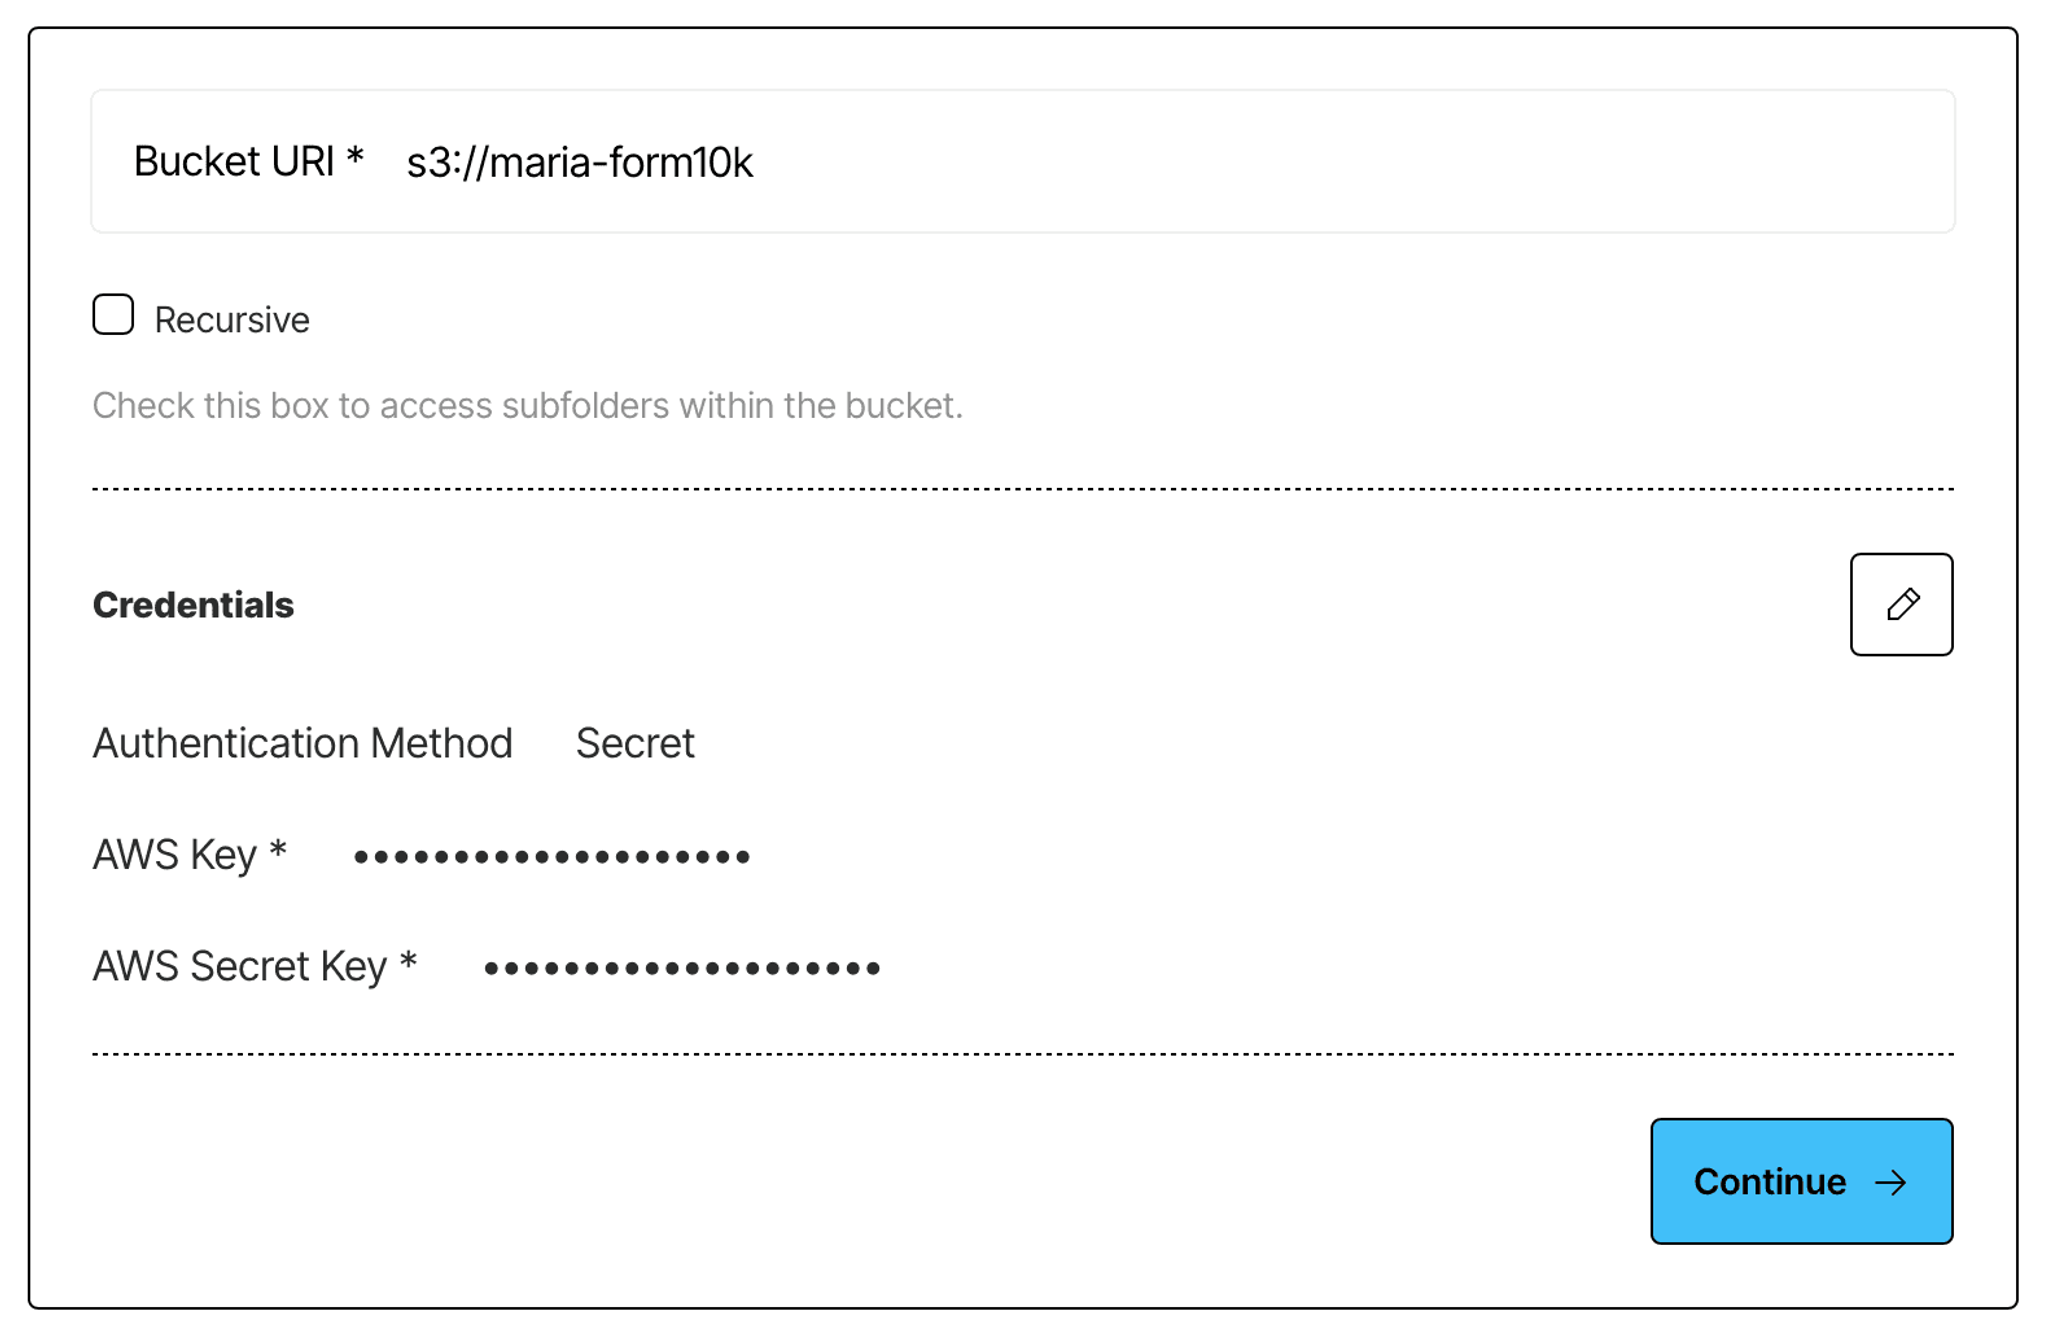
Log in to your Unstructured Platform account, click Connectors on the left side bar, make sure you have Sources selected, and click New to create a new source connector. Alternatively, use this direct link. Choose S3, and enter the required info about your bucket. If you’re unsure how to obtain the required credentials, Unstructured docs contain helpful instructions and videos that guide you through the setup of your S3 bucket for ingestion and obtaining the necessary credentials - check it out.
Create a Google Drive source connector in Unstructured Platform
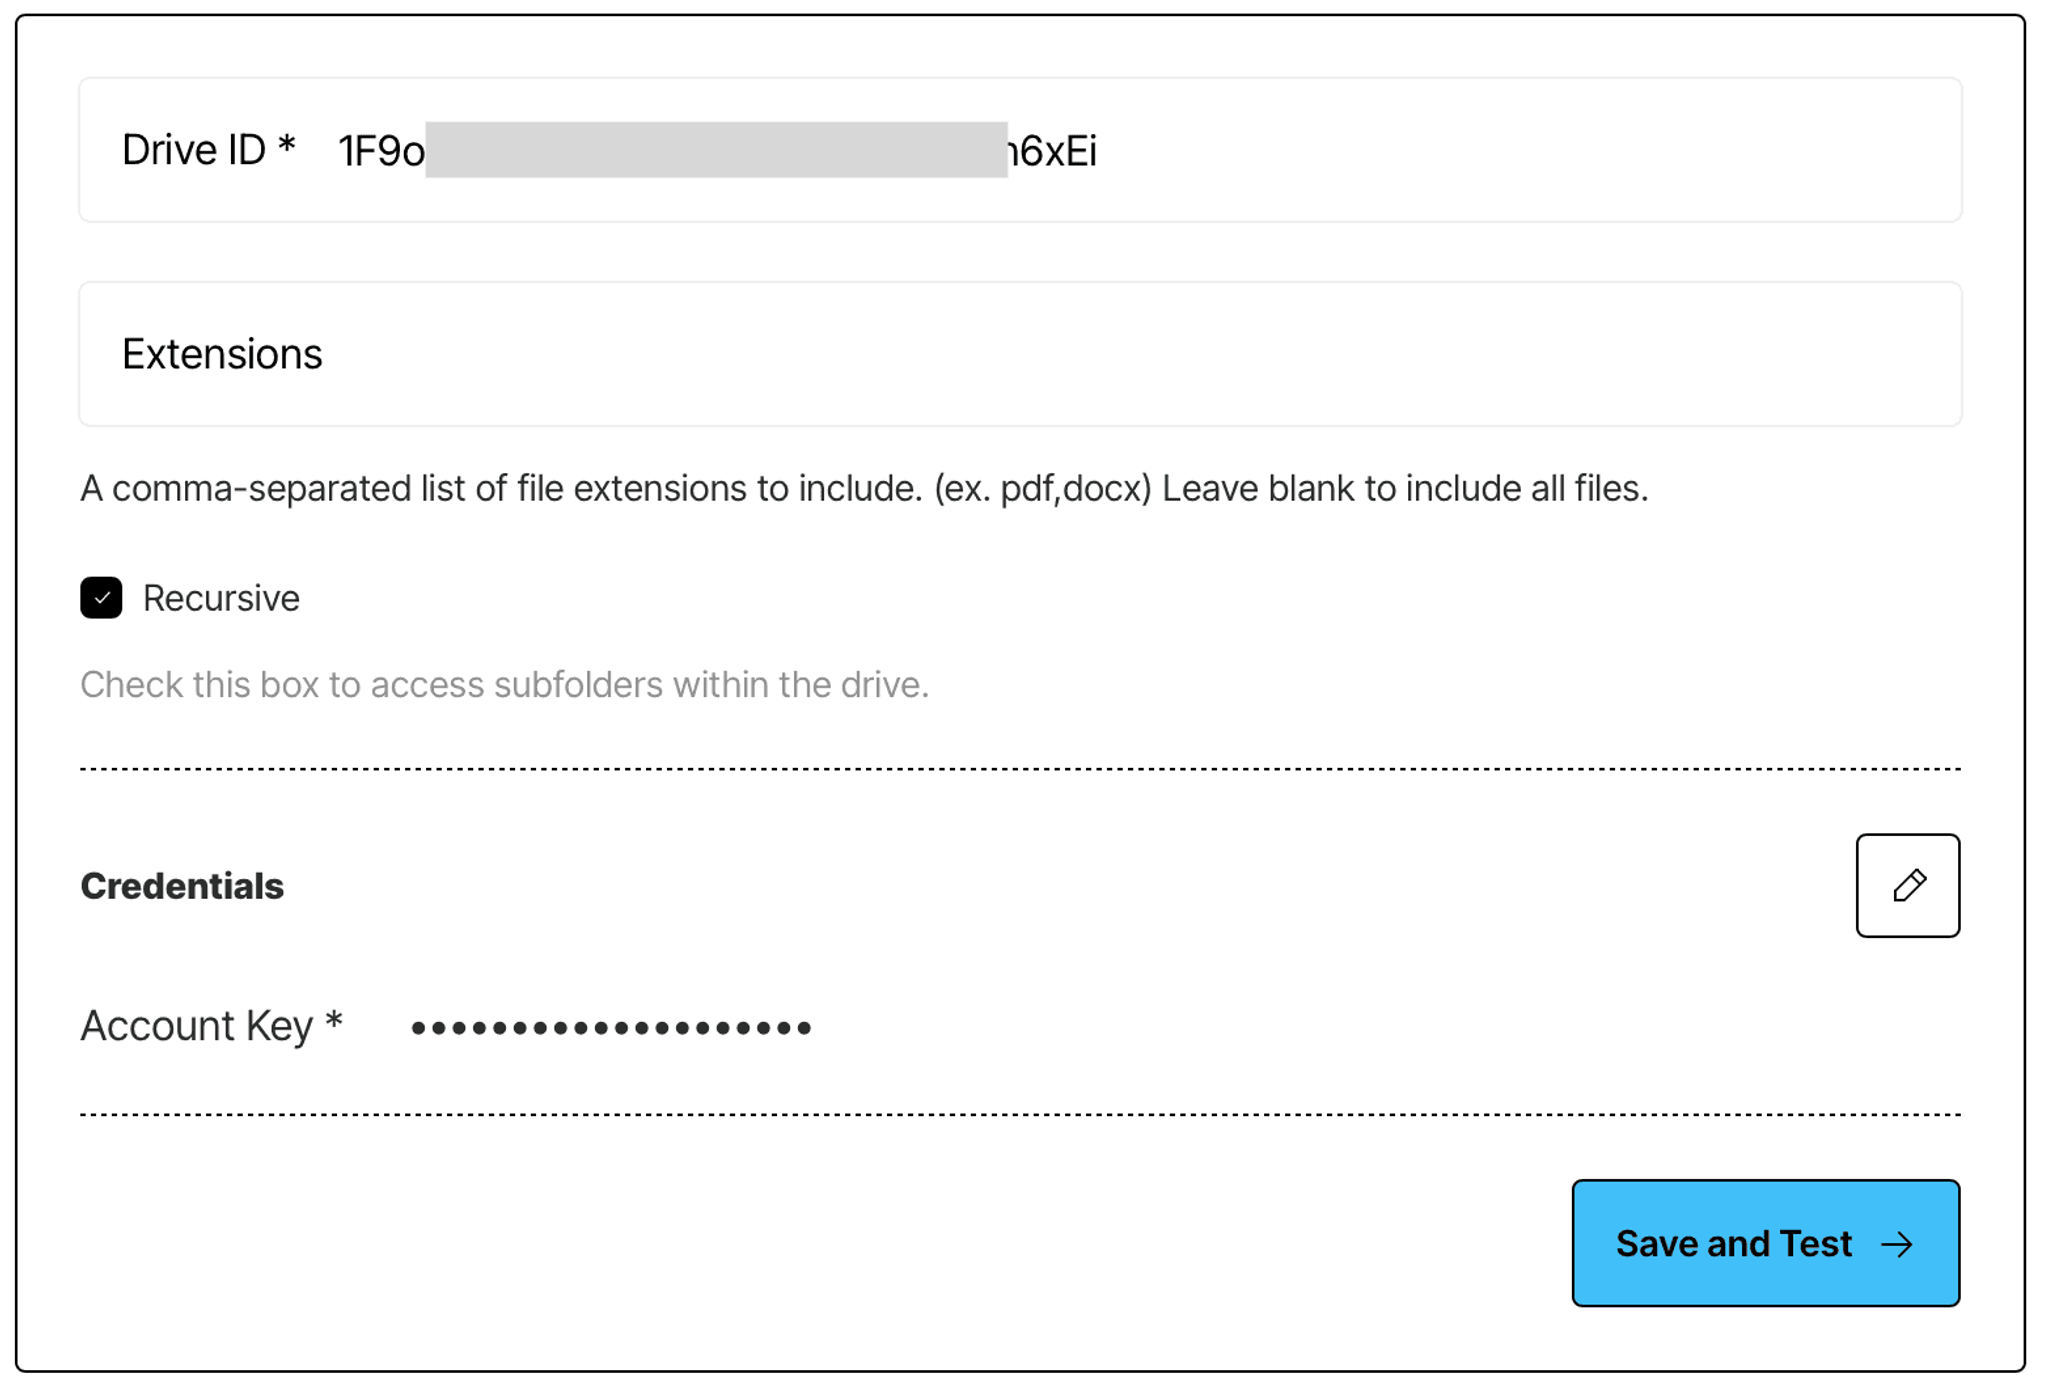
In the same manner, create a Google Drive source connector.
- Follow the instructions in Unstructured documentation to learn how to enable Google Drive API in your Google Cloud account, create a service account, and obtain a key.
- Make sure to share your Google Drive folder with your service account.
- Find your Google Drive folder id - it is a part of the URL for your Google Drive folder: https://drive.google.com/drive/folders/{folder-id}.
Set up a Delta Table in Databricks
You can reproduce the setup in this tutorial by using the trial version of Databricks.
Once you create an account, and the cloud set up is complete, note down the URL of your workspace (you’ll get it in the email), as you will need it later on to connect to your workspace.
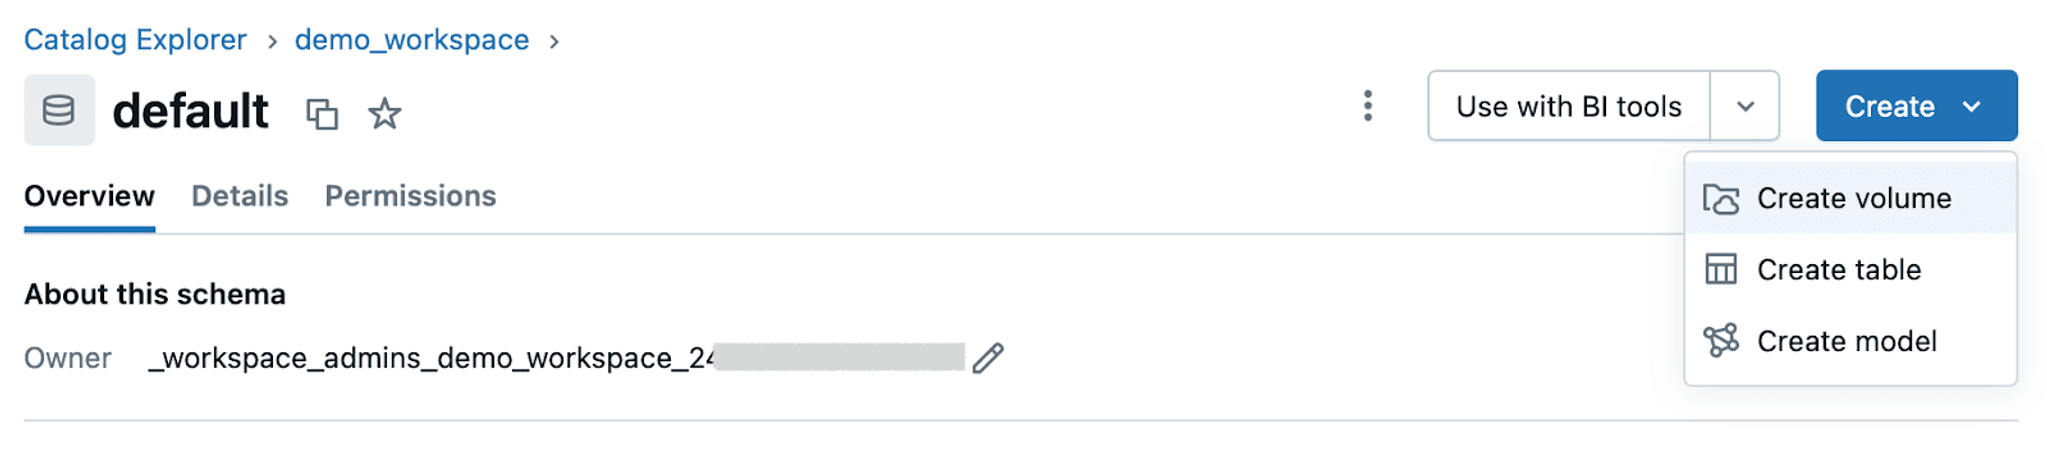
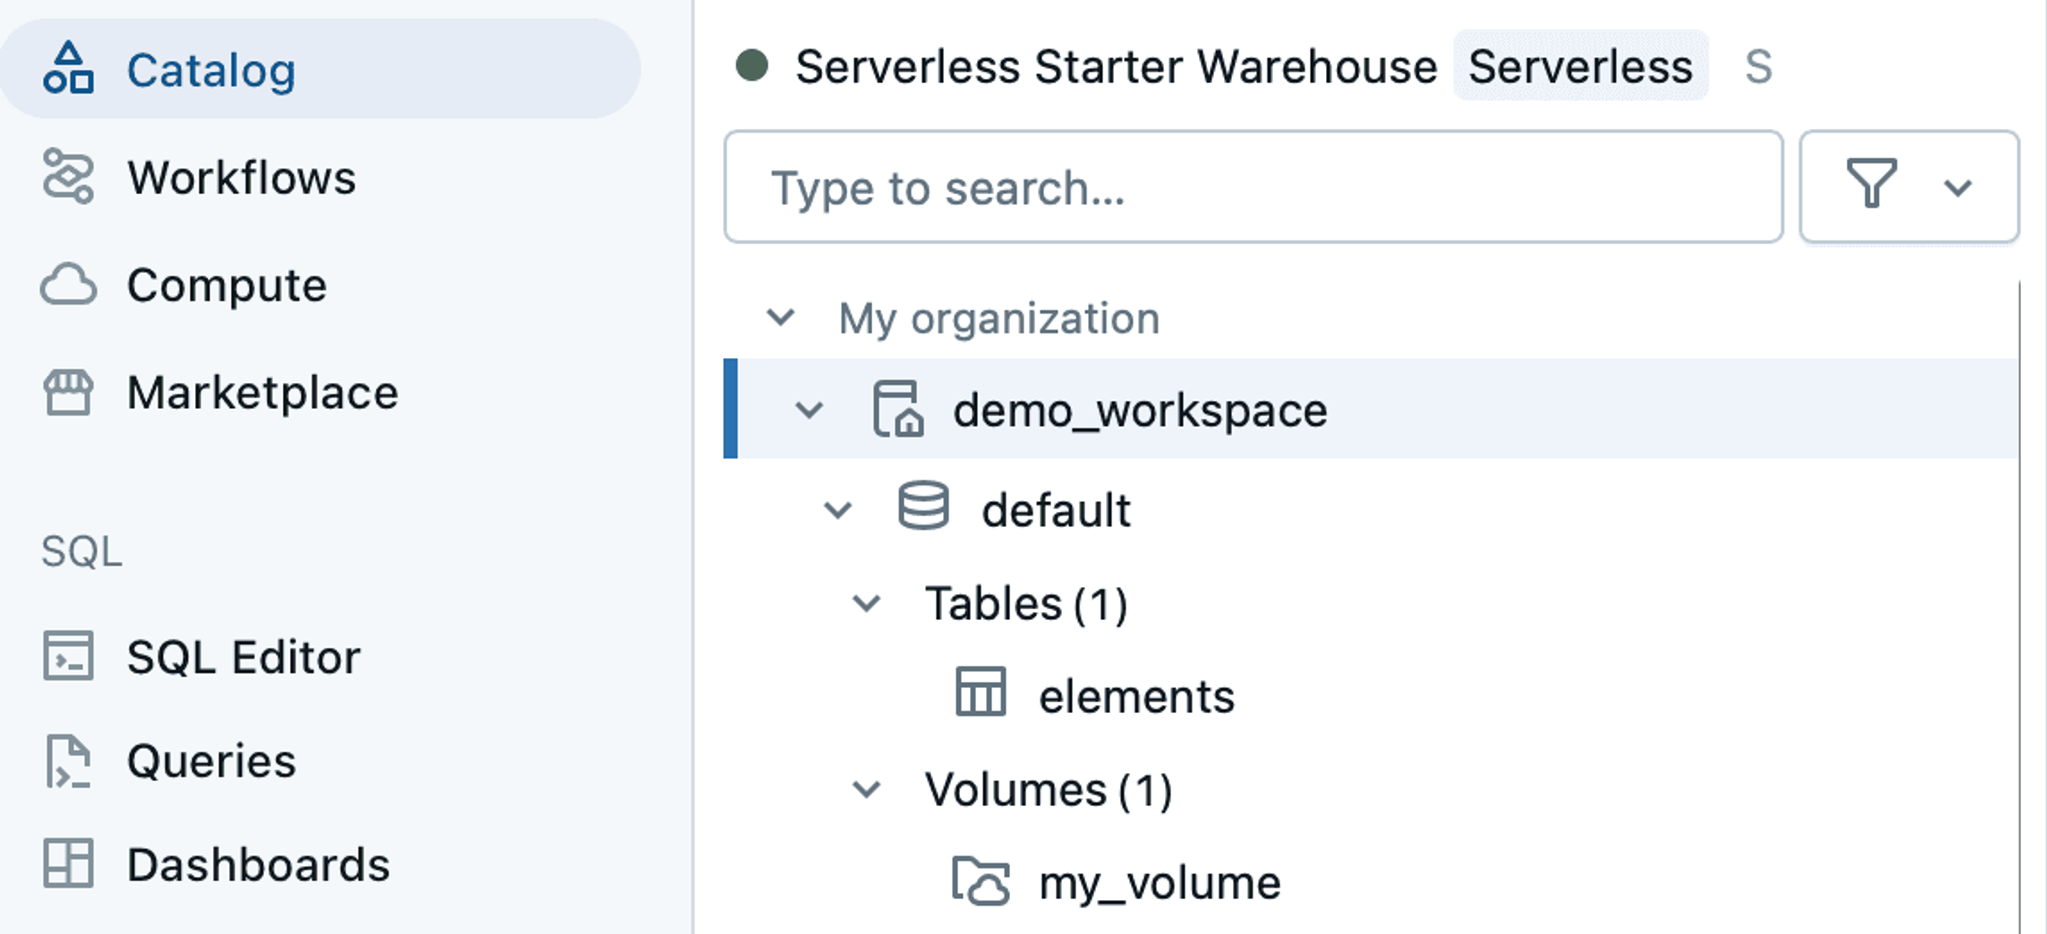
In your workspace, navigate to your Catalog, called demo_workspace here, find a schema called default. In that schema, create a volume:
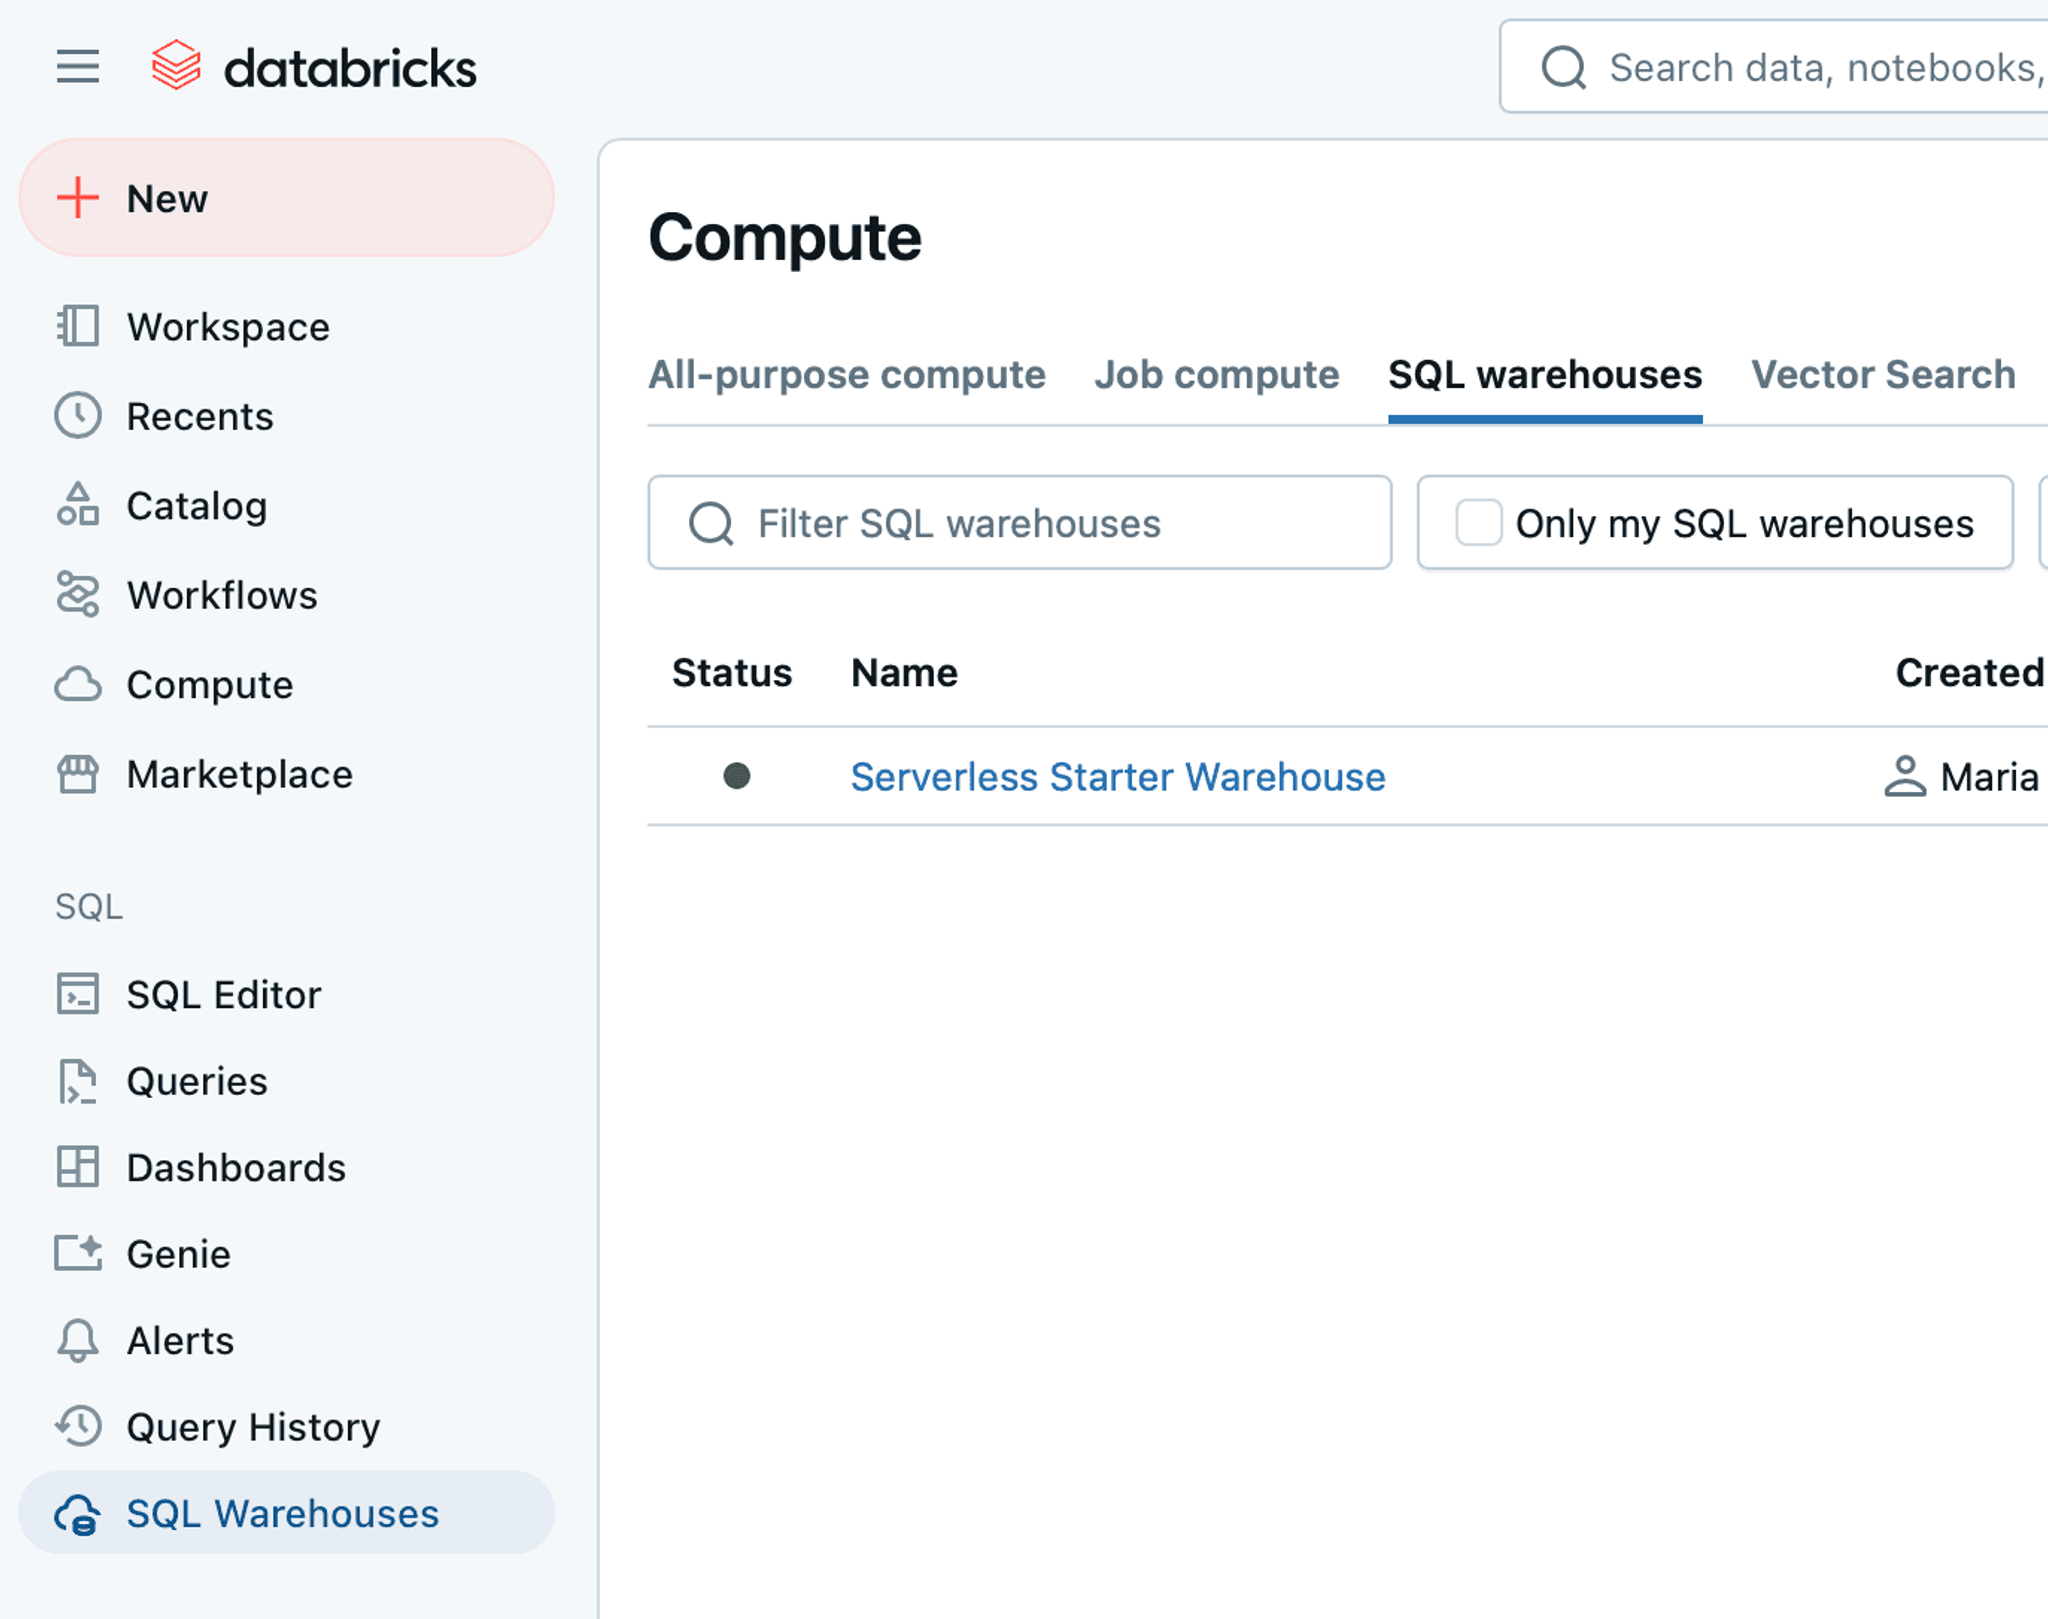
Next, you need to create a table - we’ll do that using the SQL Editor. However, before navigating to the SQL Editor, go to SQL Warehouses to make sure that you have a Serverless Starter Warehouse and that it is running:
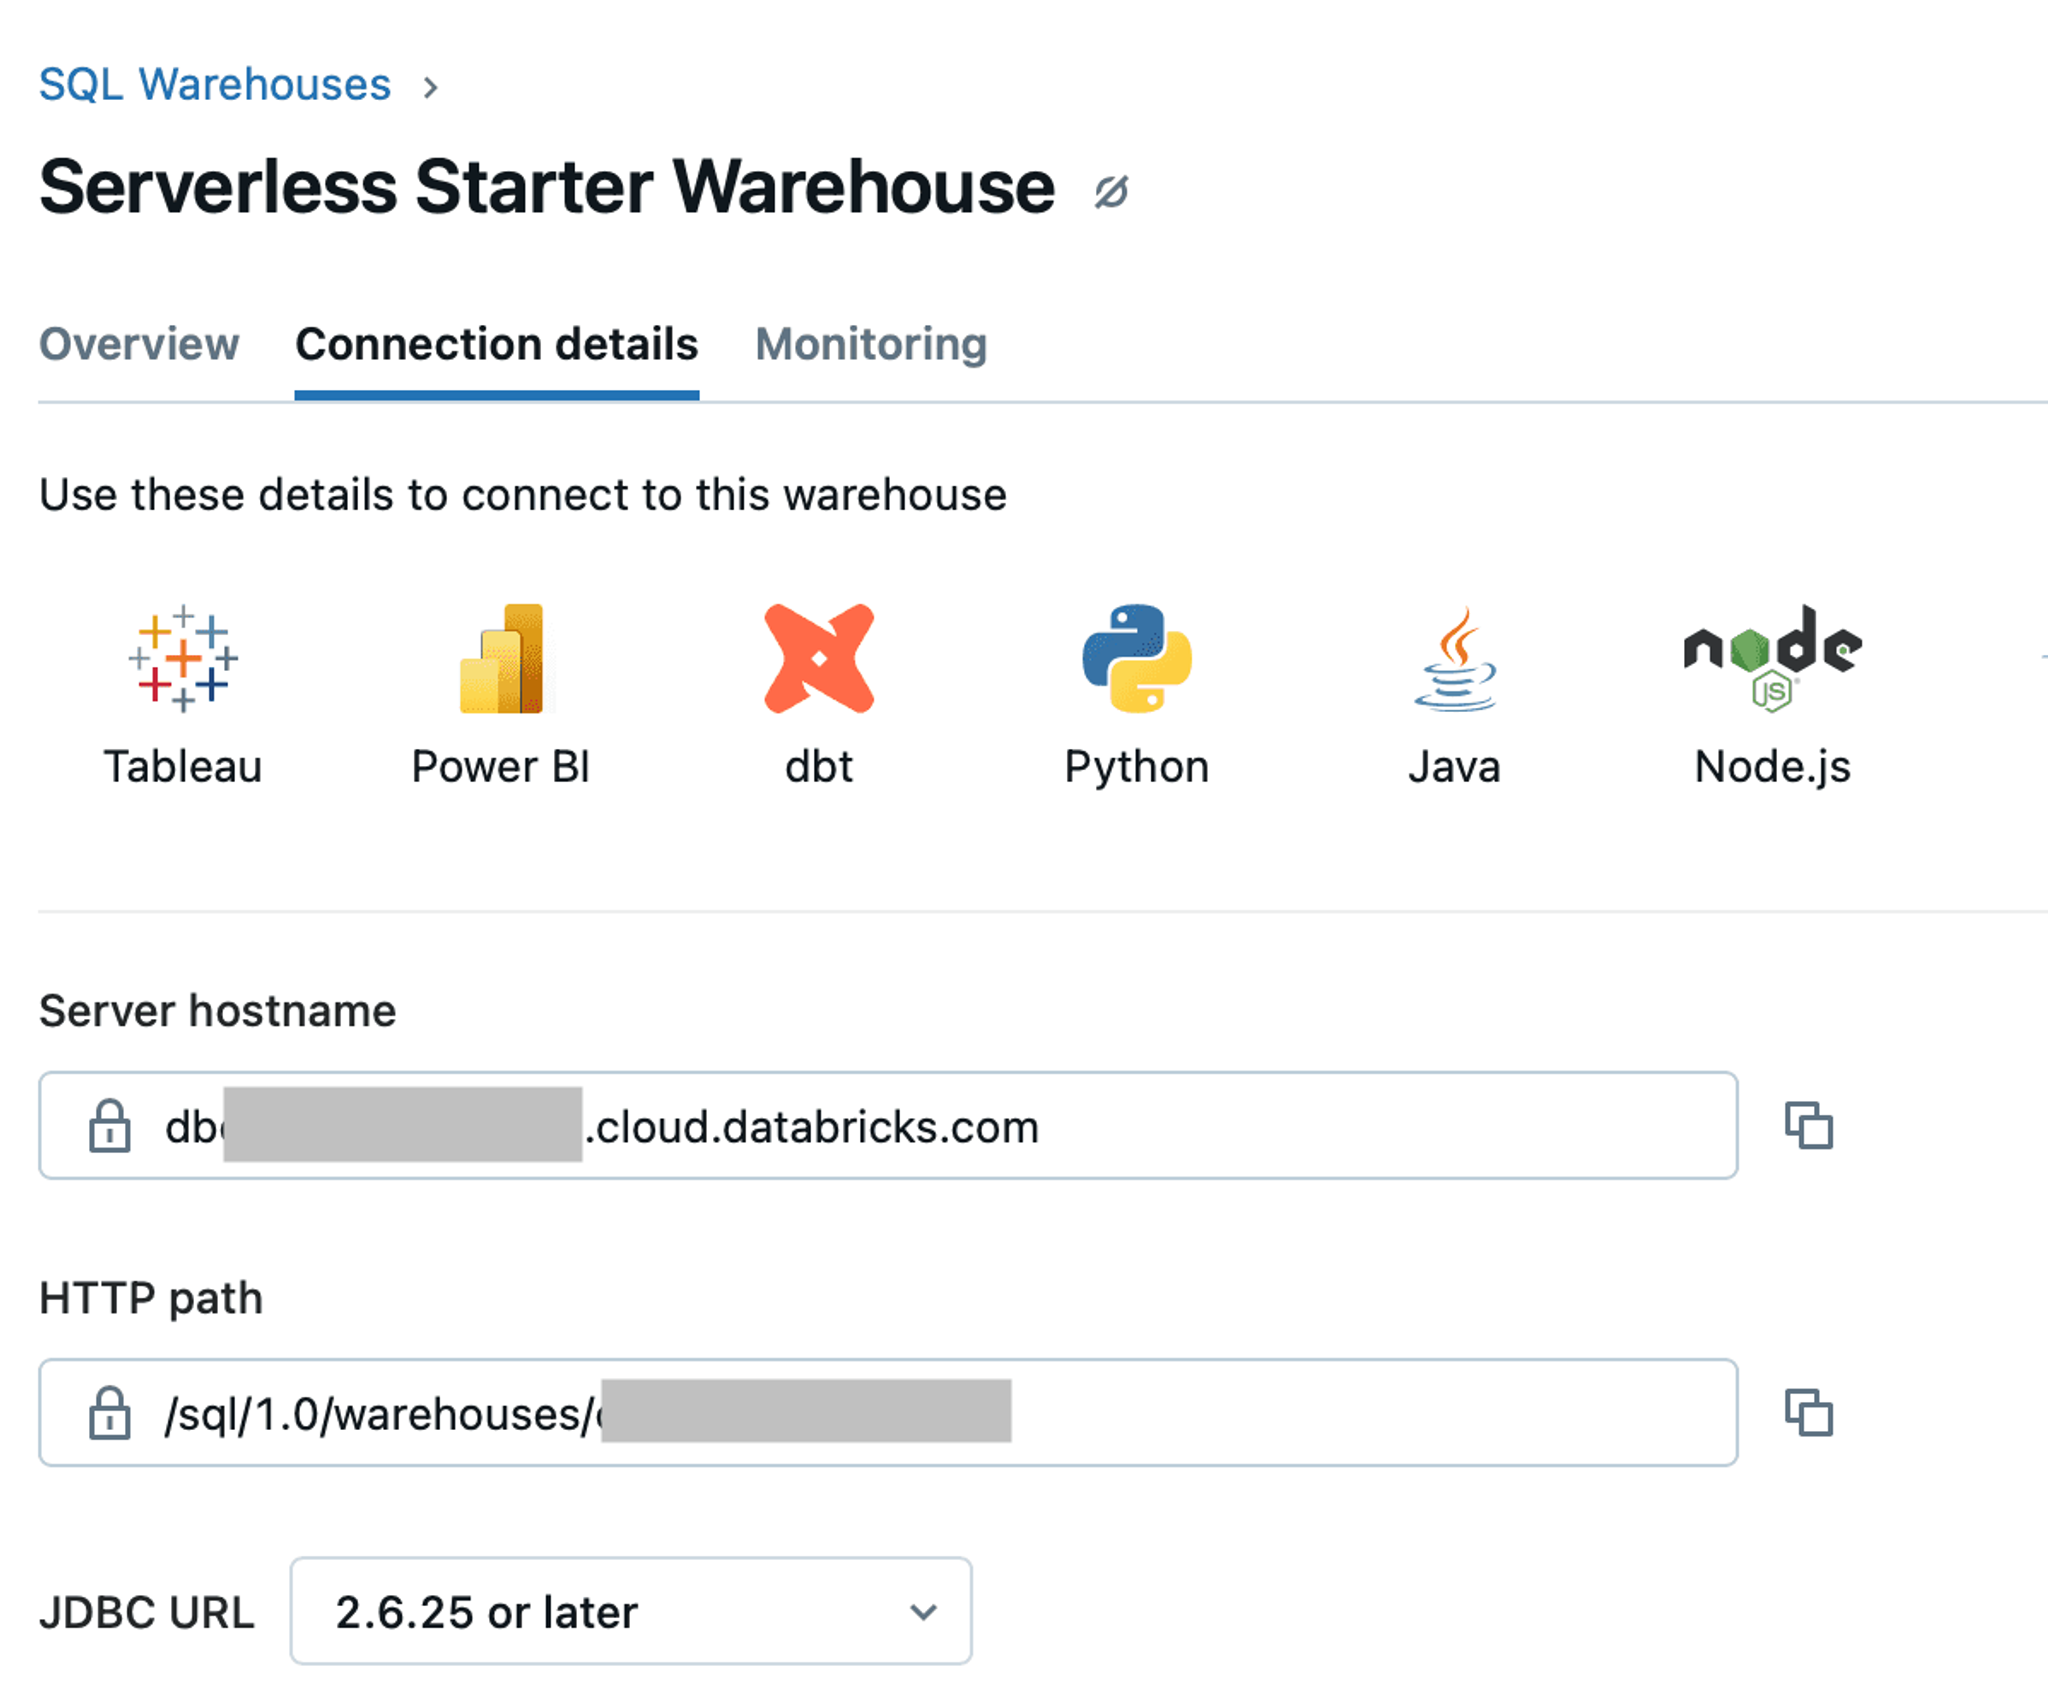
Once you confirm that your Serverless Started Warehouse is alive and kicking, click on it and navigate to the Connection details tab. Copy the values for the Server hostname and HTTP path. You’ll need them later when creating a destination connector in Unstructured Platform:
Now go to the SQL Editor and run the following query. Note that you may need to modify the first line to change it to <your_catalog>.<your_schema>.elements:
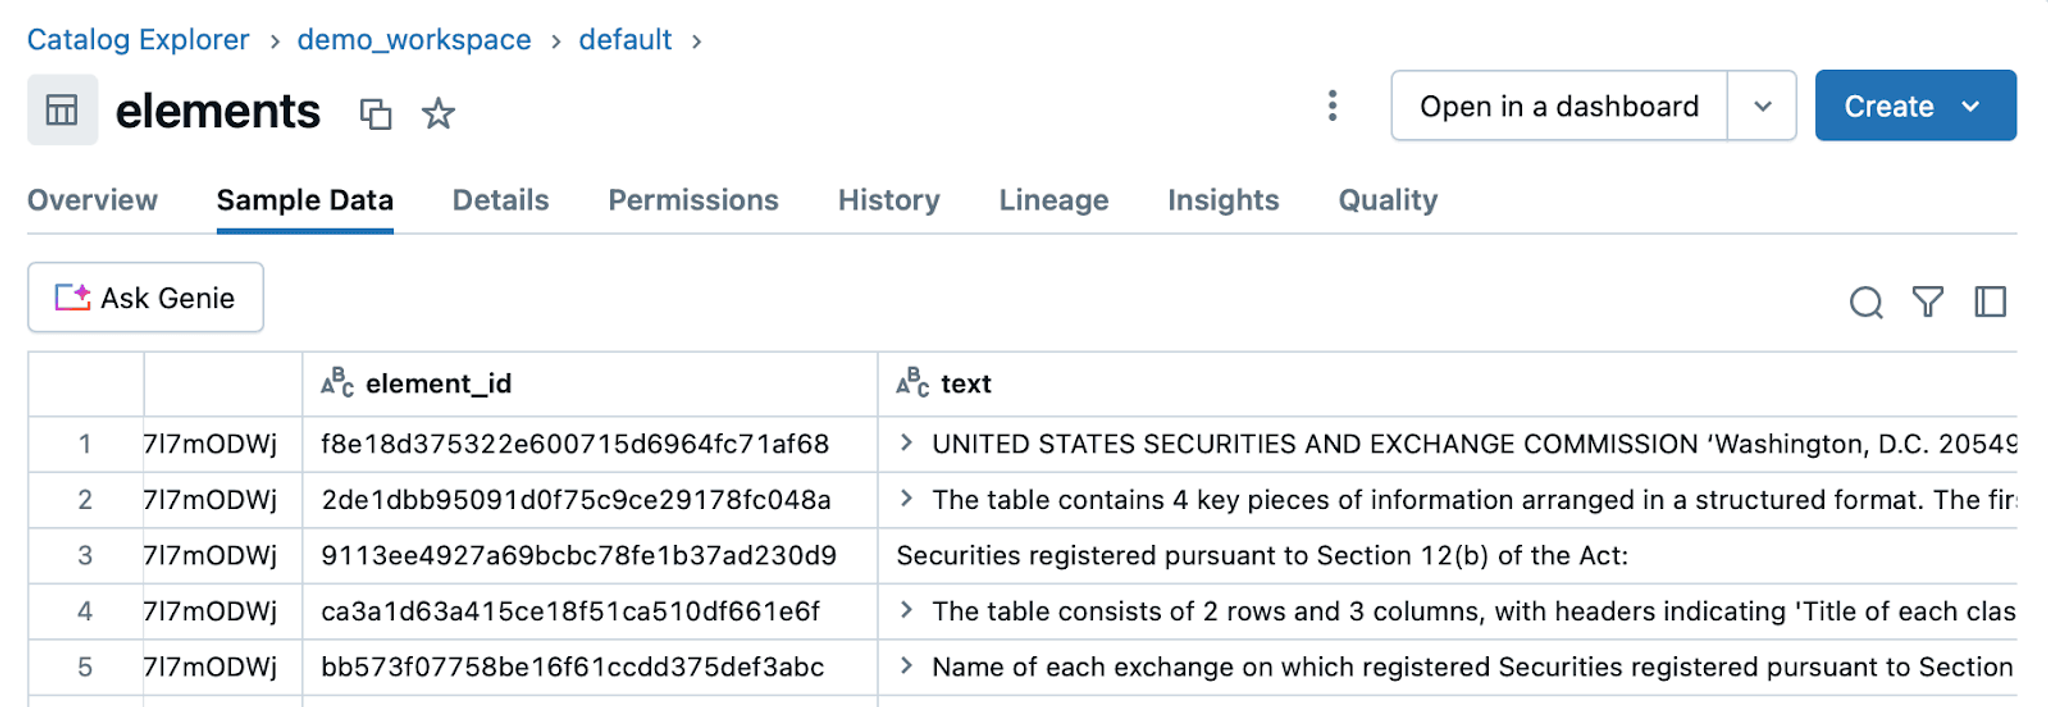
Running this query will create a table called elements in your catalog under the default schema. You should see it in in your catalog now:
Now, we just need to make sure we have access to write to this table from Unstructured.
Unstructured Platform currently supports two authentication methods - a Personal Access Token and Service Principal. Service Principal is a more secure method of authentication, and is better to use in a production environment. However, in this tutorial we’ll be using an access token, because it’s simpler to experiment with, and also because this is what LangChain integration supports.
To get a personal access token, click on your profile icon in the upper right corner and go to Settings. Navigate to Developer settings and click Manage next to Access tokens:
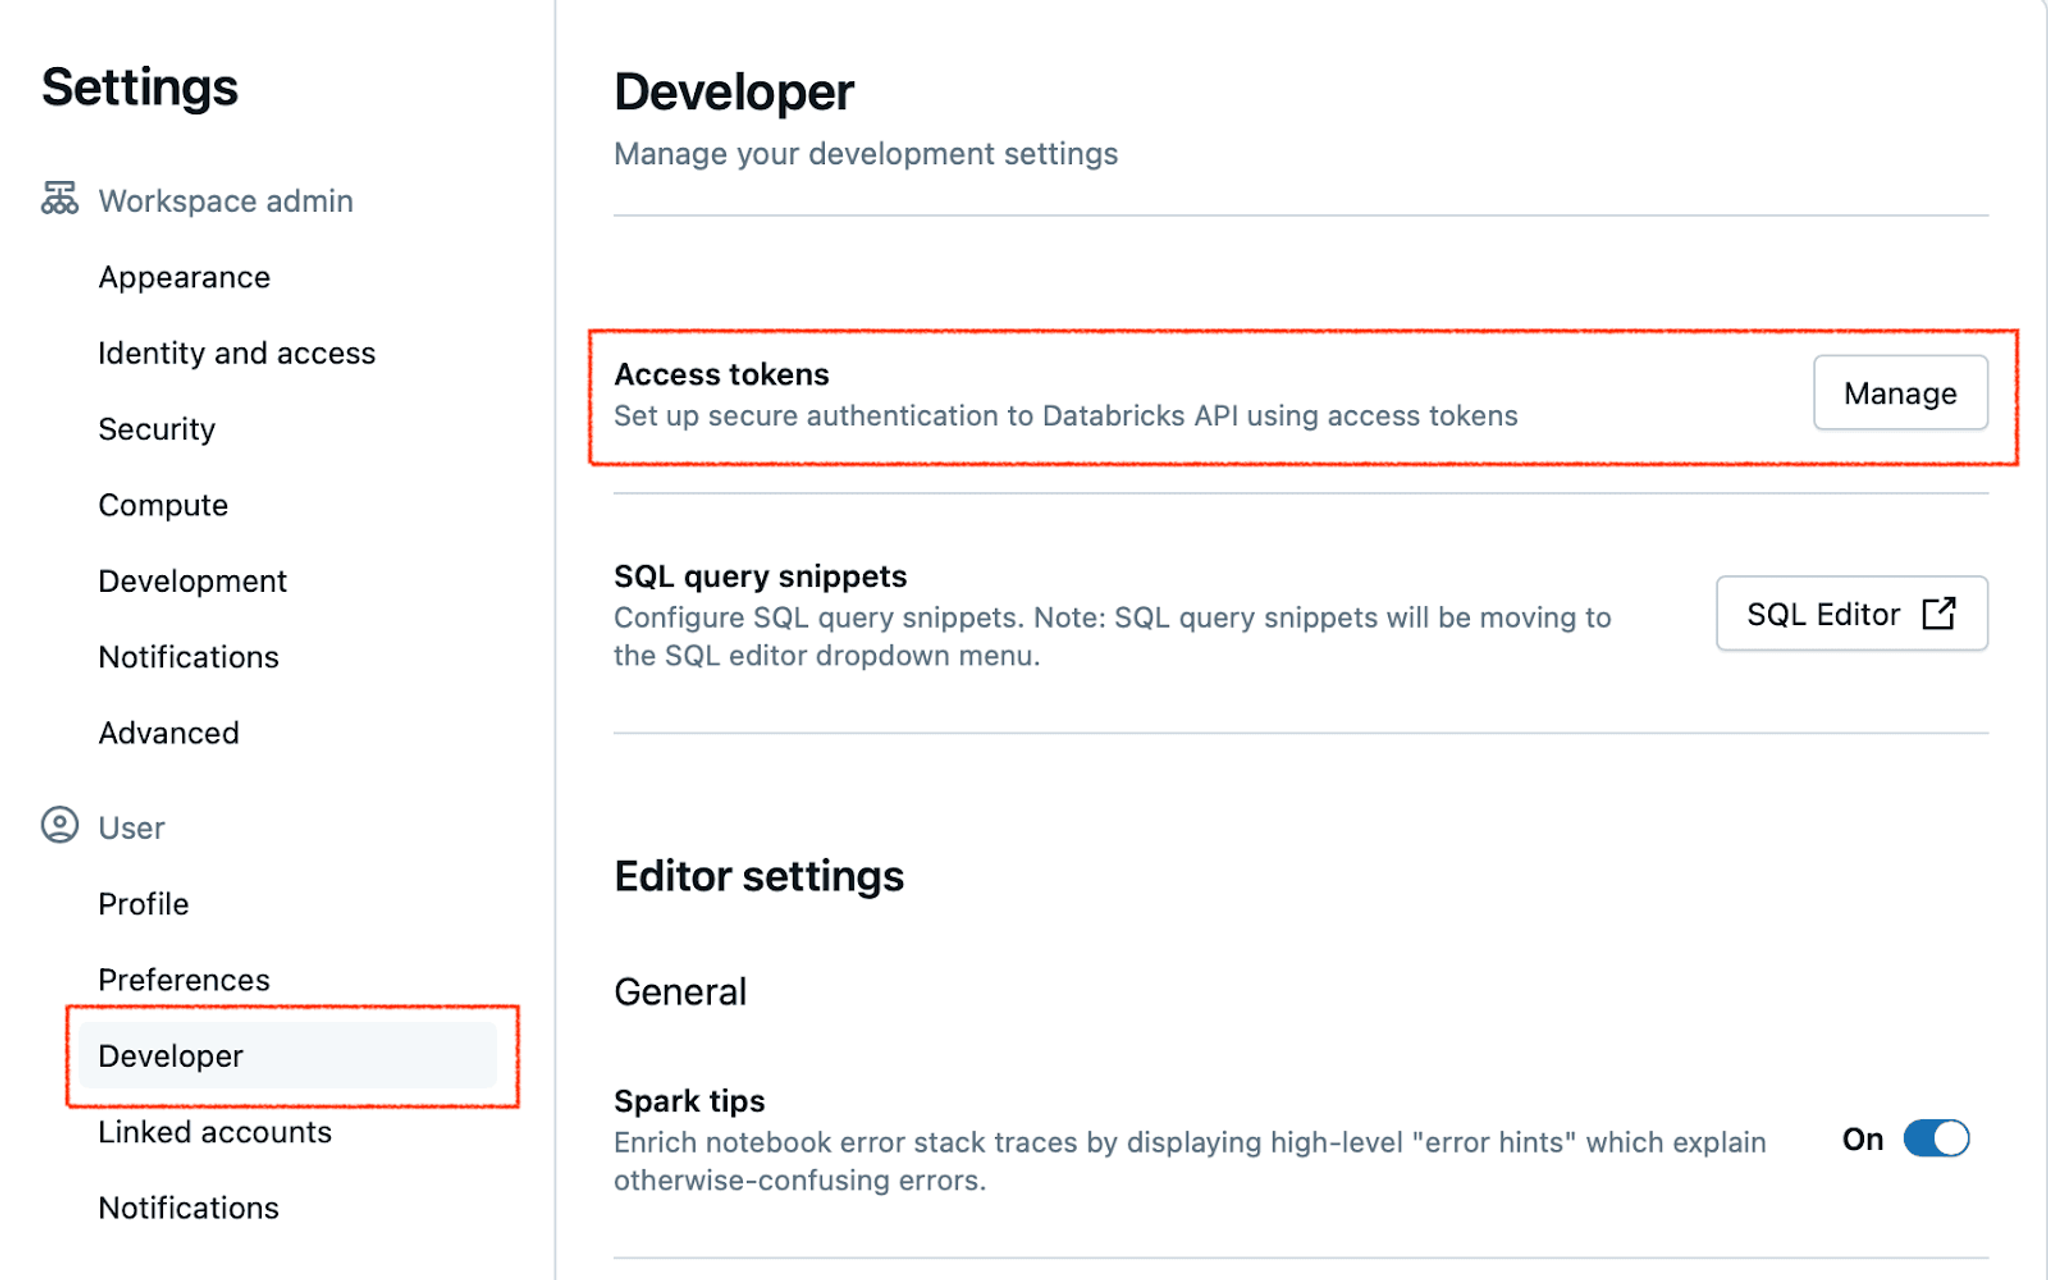
Generate a new token, and copy and save its value - you won’t be able to access it again!
Now we can create a destination connector in the Unstructured Platform for this new Delta Table in Databricks.
Create a Delta Tables in Databricks destination connector in Unstructured Platform
To create a new destination connector, you can navigate to Connectors in the Platform UI, switch to Destinations, and click New; or use this direct link.
Give your connector a descriptive name, choose Delta Tables in Databricks as the provider, and then provide the authentication information you’ve just obtained.
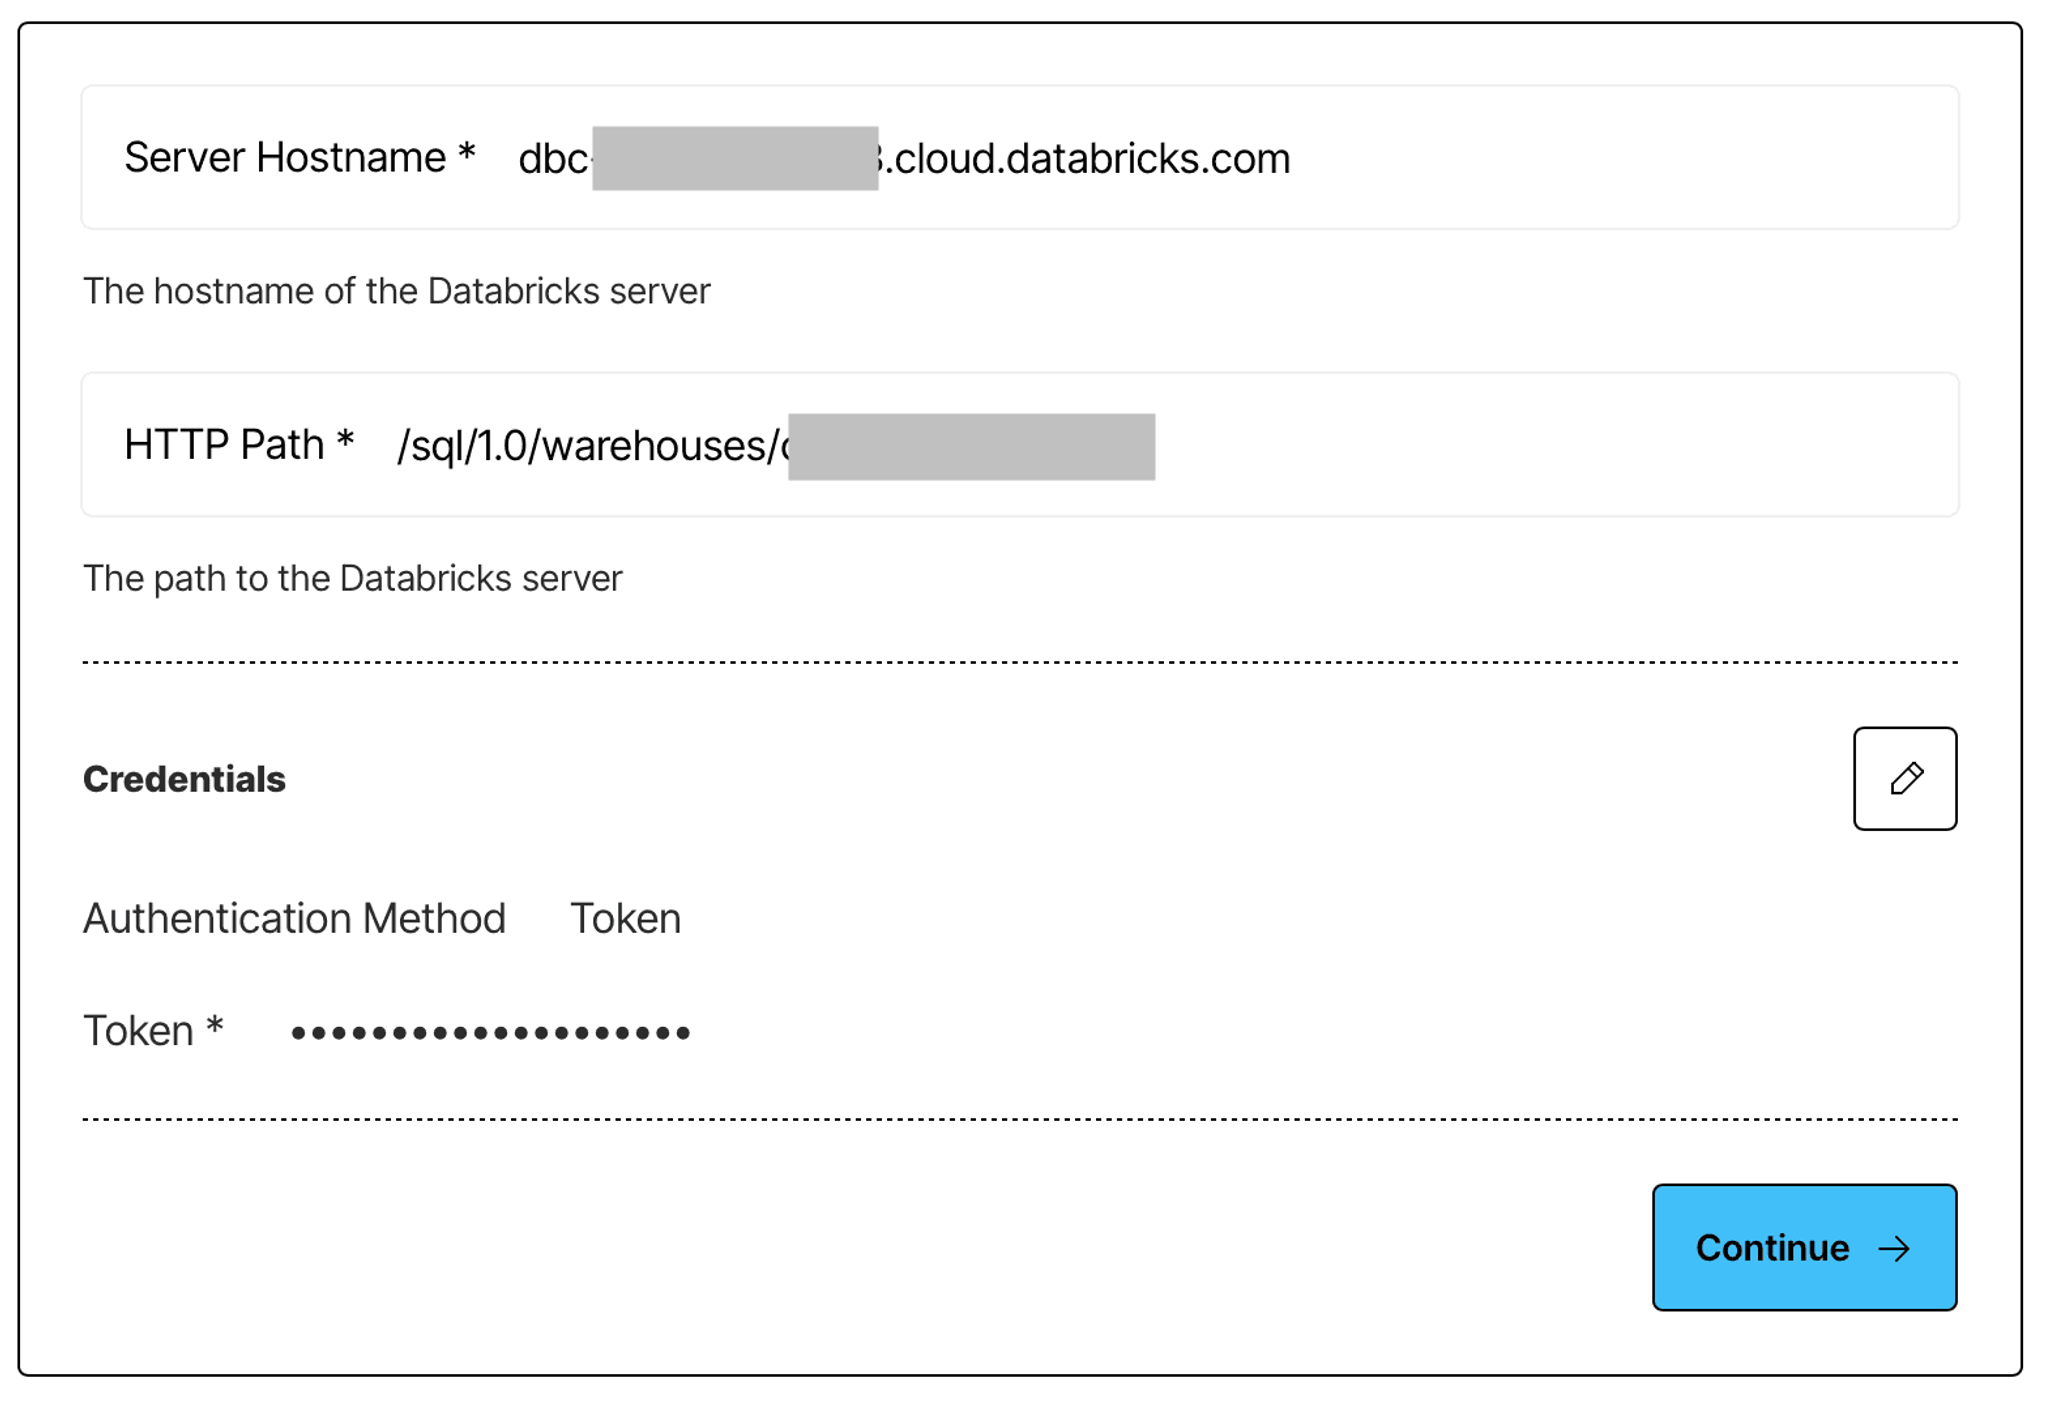
Click continue, and enter the remaining information:
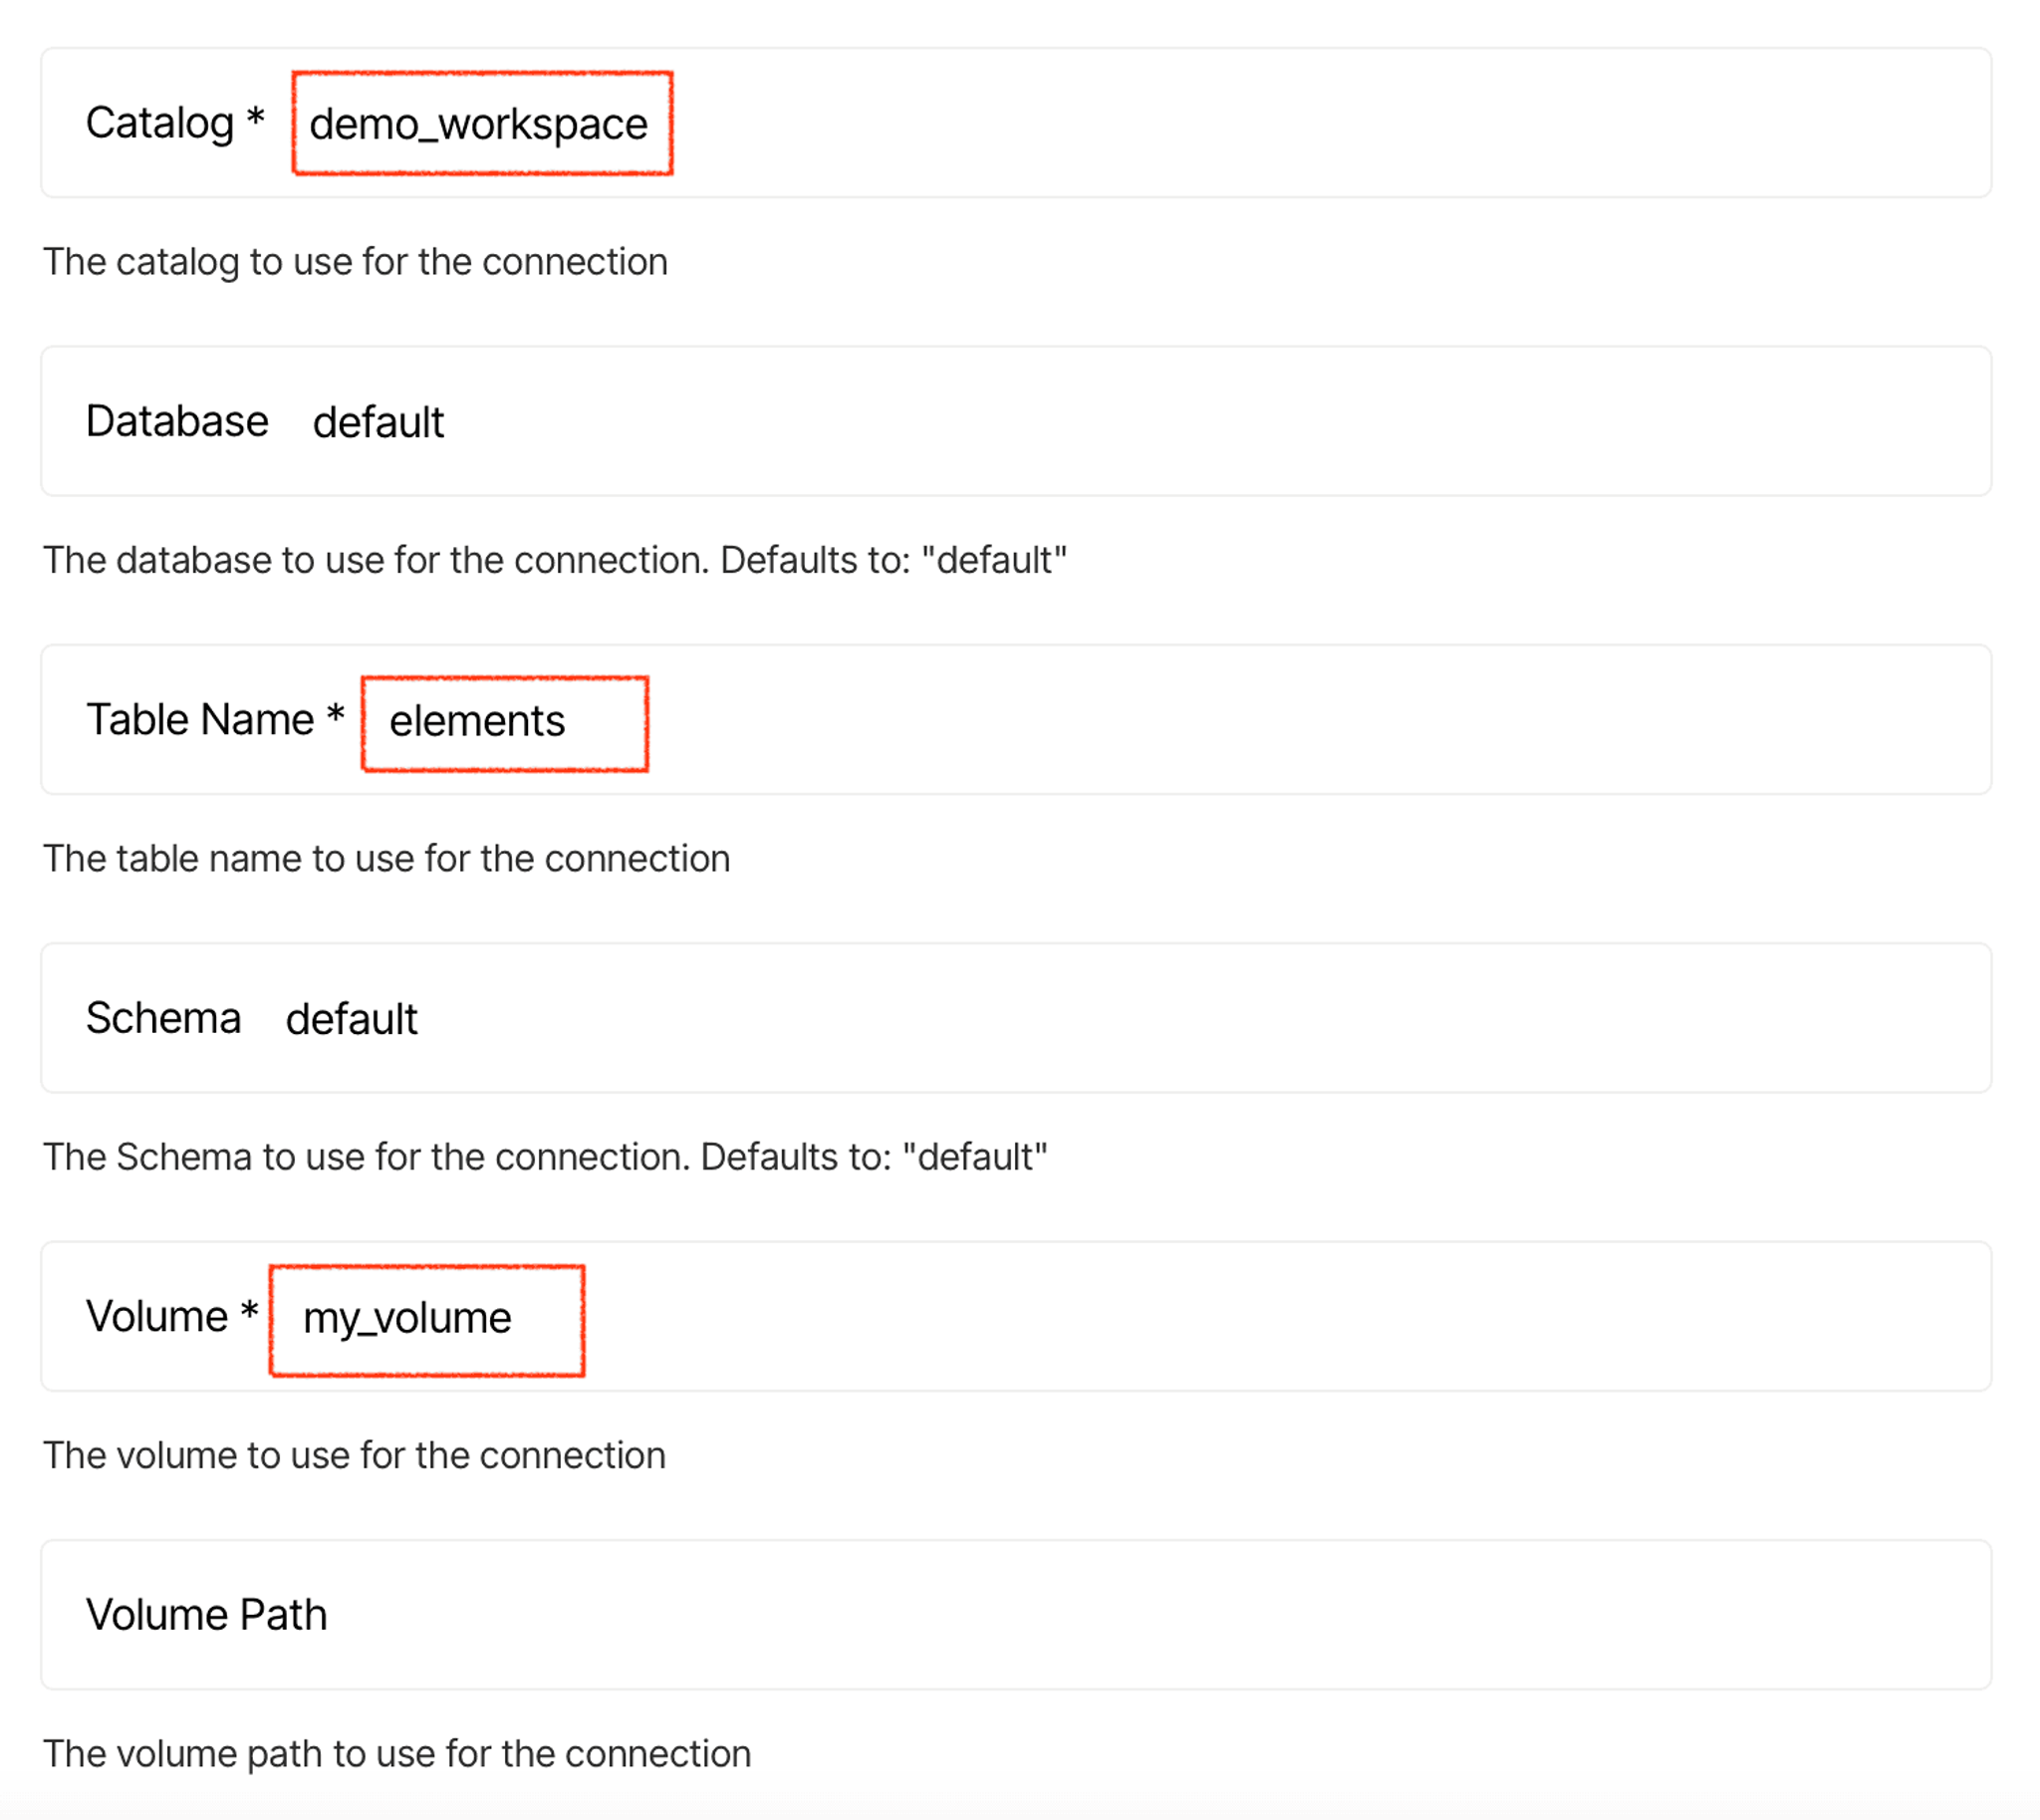
When done, click Save and Test, and Unstructured Platform will confirm that it can access and write into this new destination.
Create and run a data processing workflow in Unstructured Platform
The good news is that we’re past the hardest part of the setup process - preparing the connectors for the data sources and a destination. Setting up a data processing workflow in the Unstructured Platform is really easy.
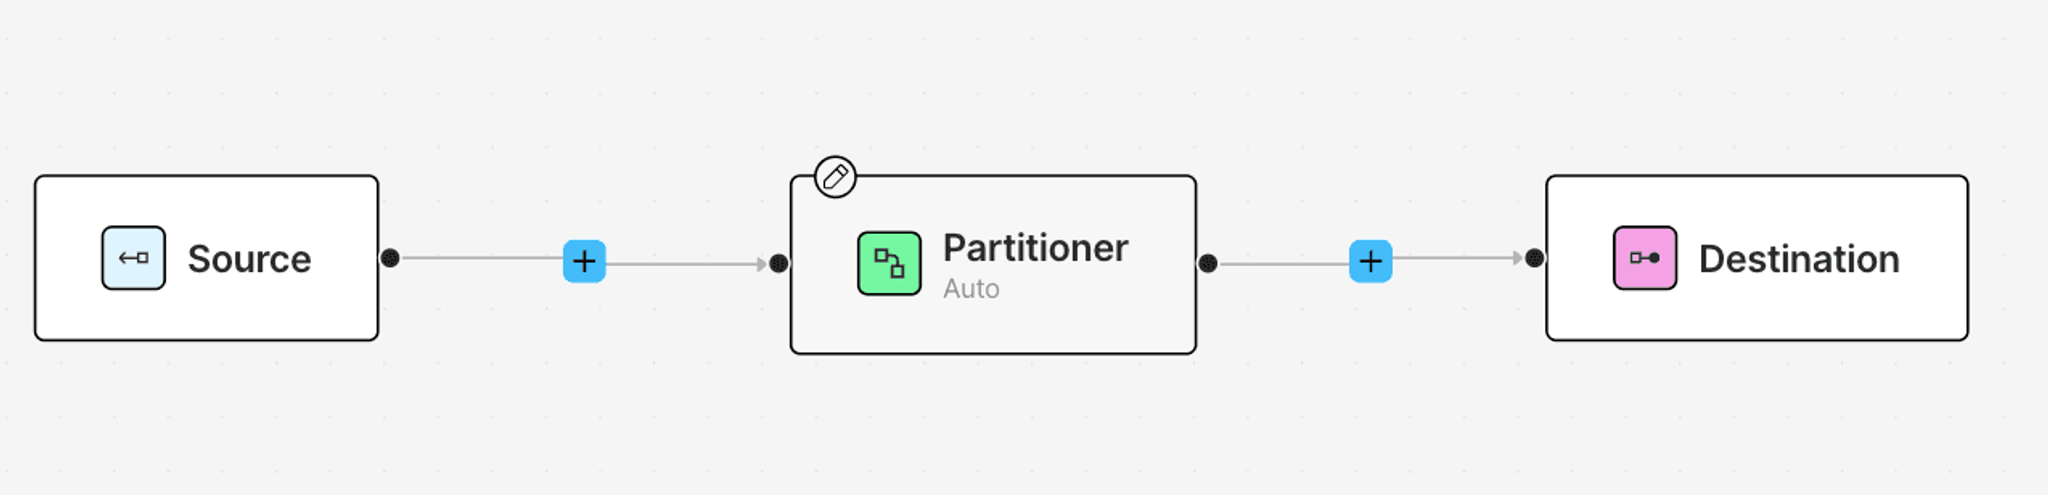
Navigate to the Workflows tab in Unstructured Platform, and click New workflow. Choose the Build it Myself option if not already selected and hit Continue. At this point, you're starting from scratch. Once you get a feel for what each part does, it’s actually pretty simple. You've got this!
What you see now is the most basic workflow: a Source from where raw data is fetched, a Partitioner that extracts the data from various file types, and a Destination where the processed data will be stored.
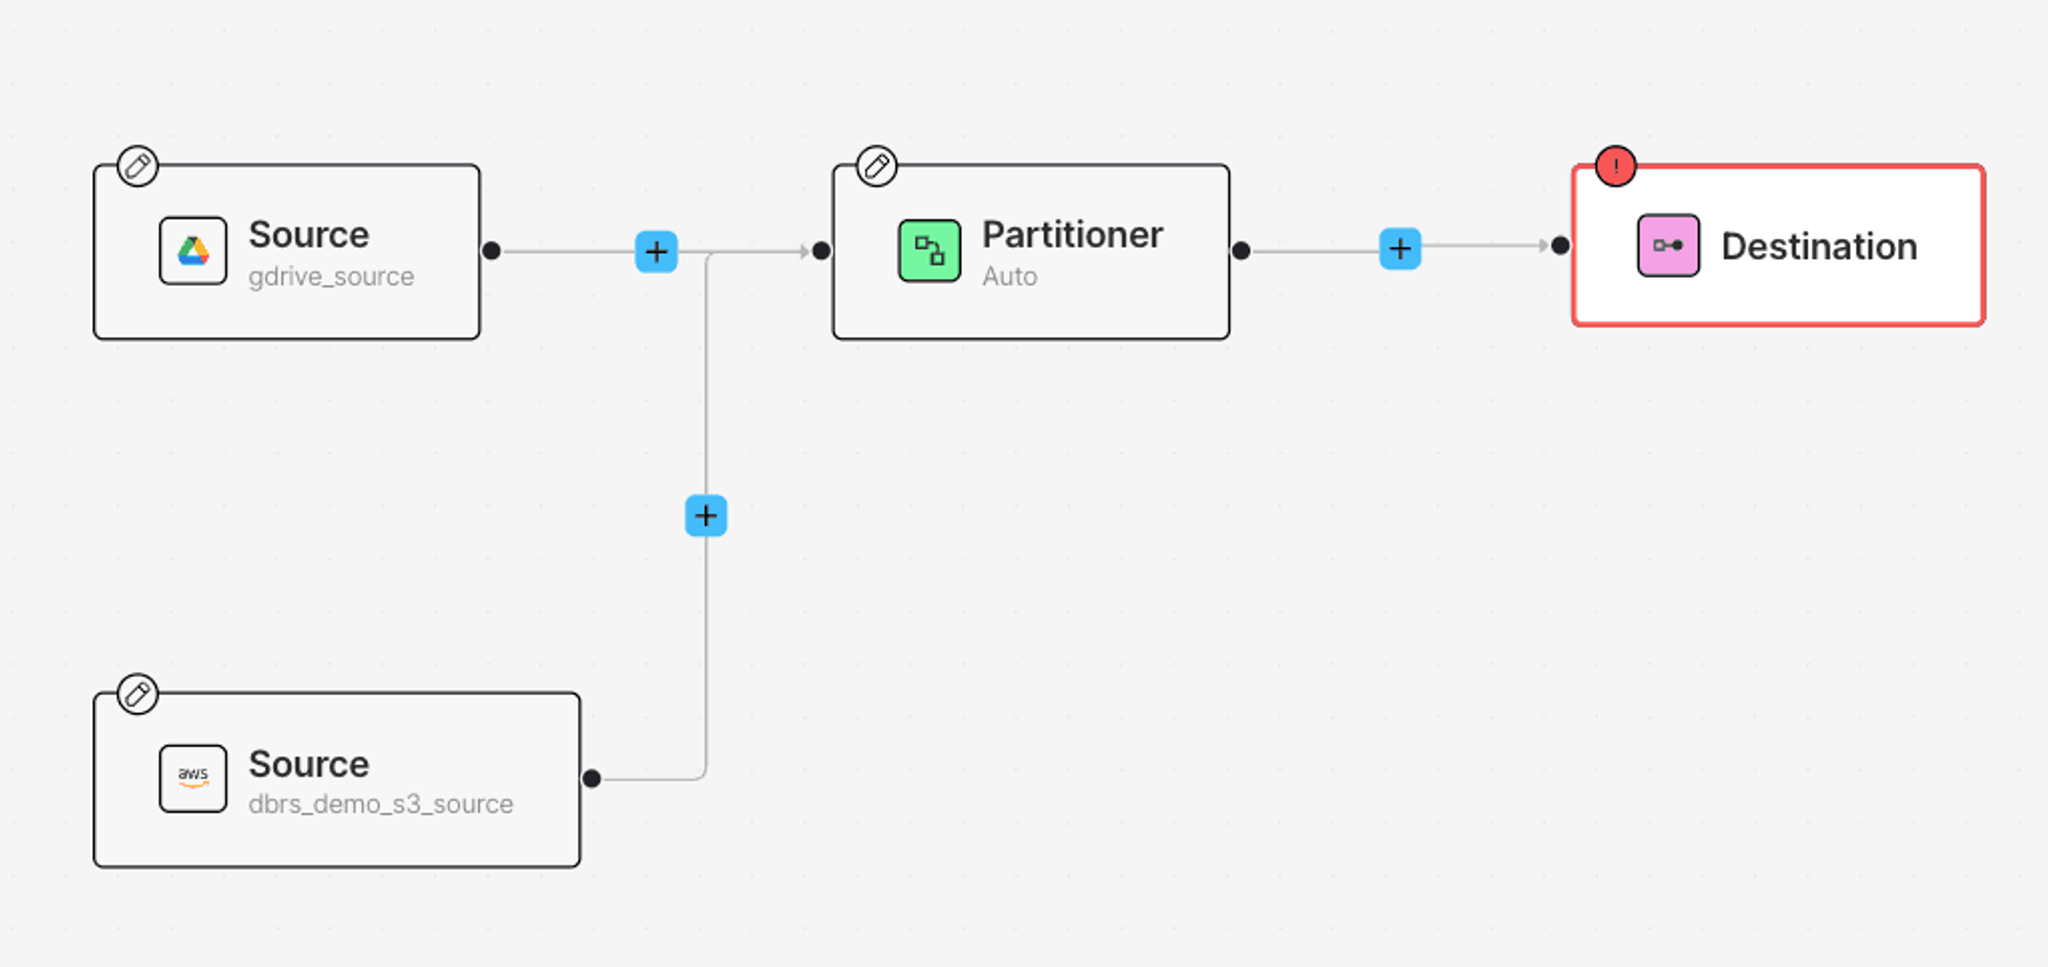
Let's begin by setting up our Sources. Click on Source, and add the Google Drive Source you just created from the details tab on your right.

Next, add the S3 Source Connector: click the + button, hover over Connect and click Source. This automatically creates another Source Node. Now, similar to last time, click on the newly added Source node, and select your S3 Source Connector from the Details tab. Once you’re all done, your workflow should look like this.
Next, add the Destination Connector: click Destination, add your newly created Databricks Delta Table Destination connector from the Details tab on your right:
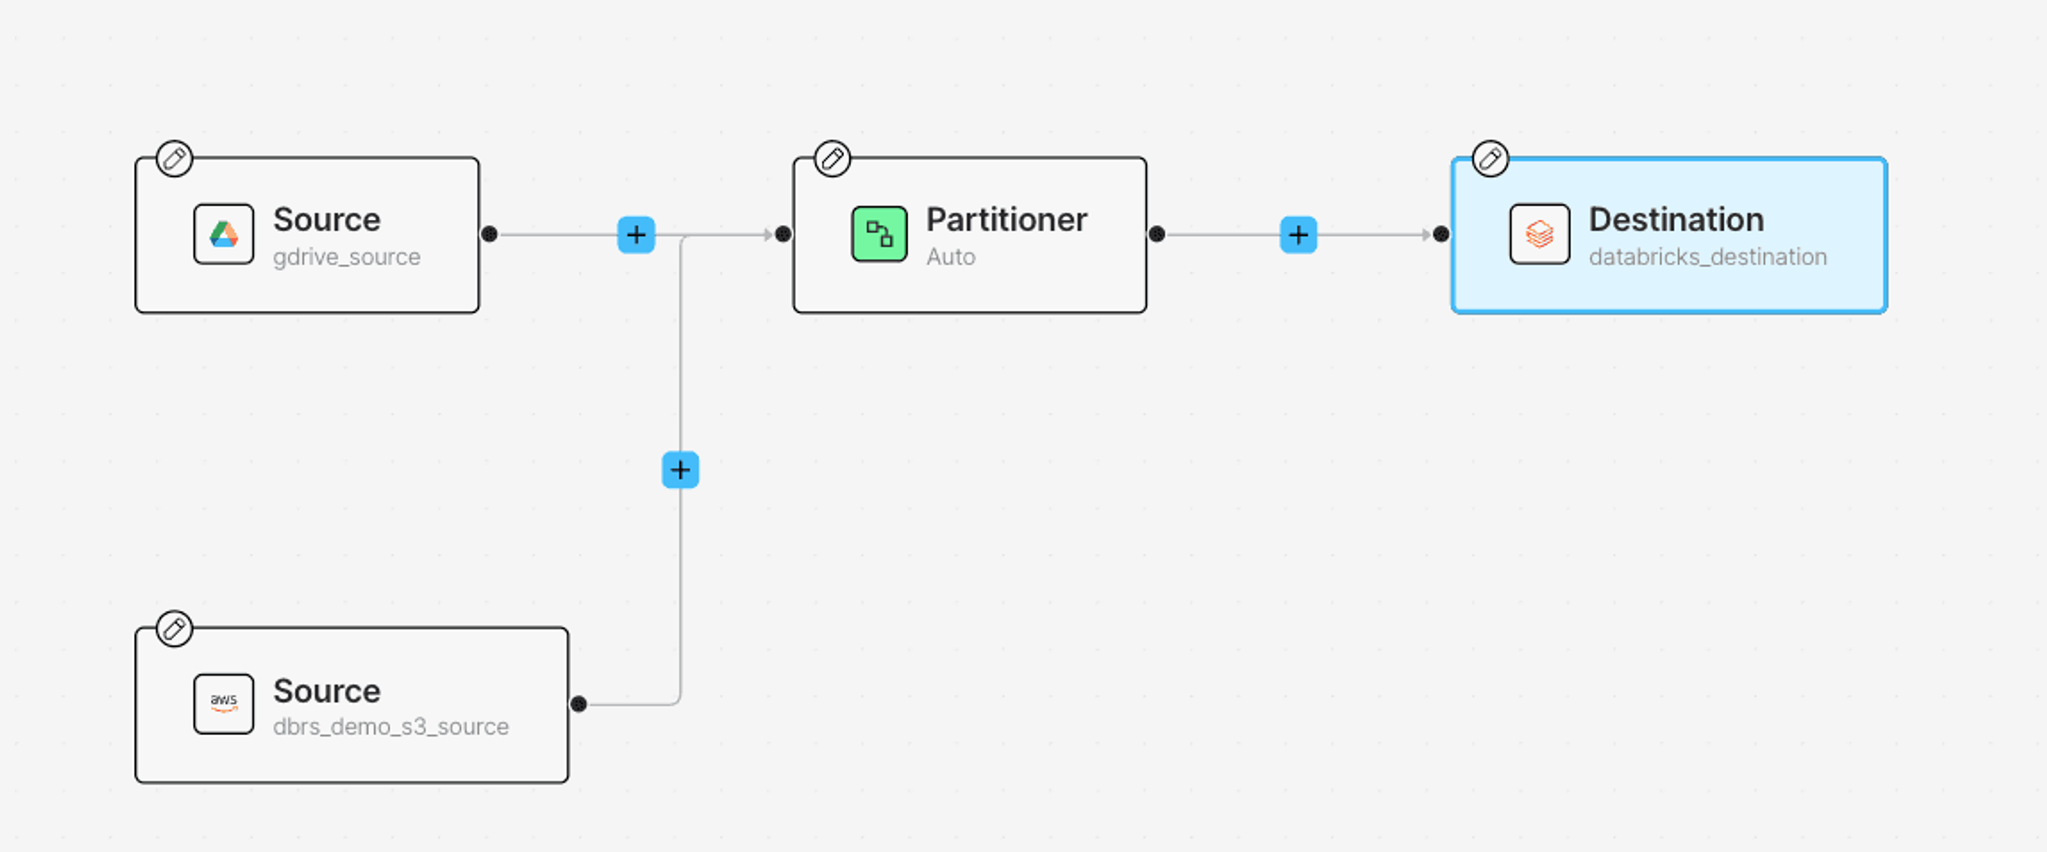
At this point, we’ve connected where the raw data comes from and where the processed results will be stored. Next, let’s explore the data transformation nodes.
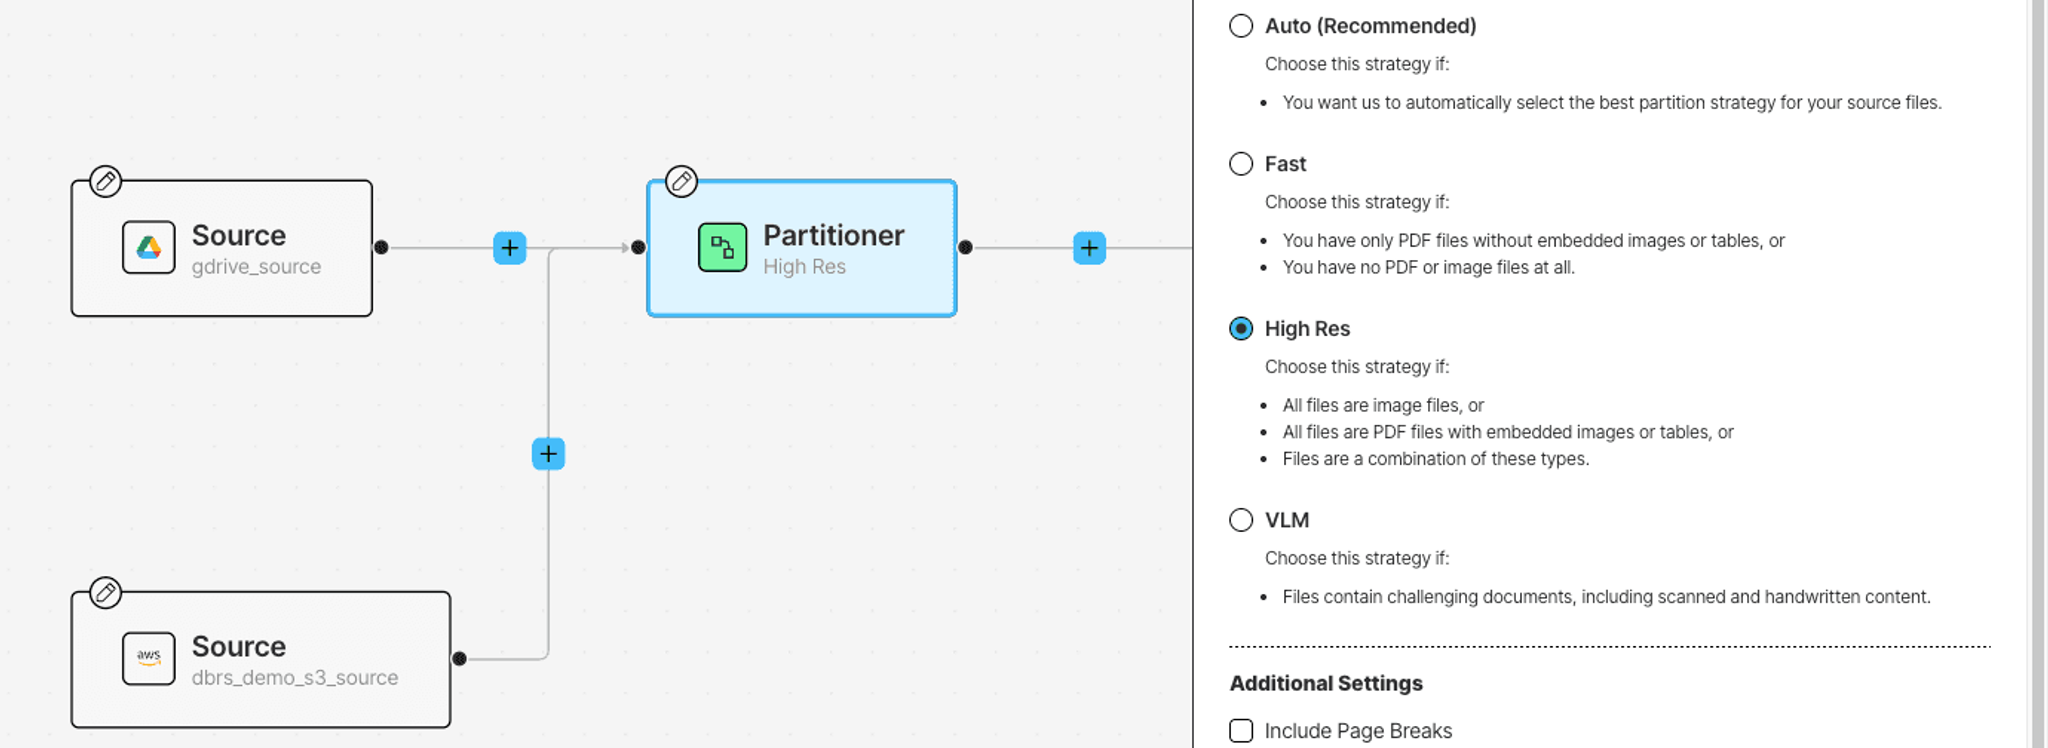
Let's look into the Partitioner node. A Partitioner transforms raw data into a JSON format for further downstream processing. The Partitioner node uses one of the following strategies:
- Fast: a fast, cost-effective, and accurate approach suitable for text-only files.
- High Res: combines document understanding capabilities with advanced OCR.
- VLM: uses advanced Vision Language Models to extract information from documents. This strategy is preferred when you have challenging document content such as handwritten text and complex scanned documents.
- Auto: dynamically selects the best strategy for each page based on the content, optimizing for lower cost while maintaining accuracy.
For this tutorial, let's go with the High Res strategy.
The Partitioner node returns a JSON file with Document Elements which are different components of the source files. There are many types of Document Elements such as Table, Image, Formula and more, each containing the extracted text and metadata.
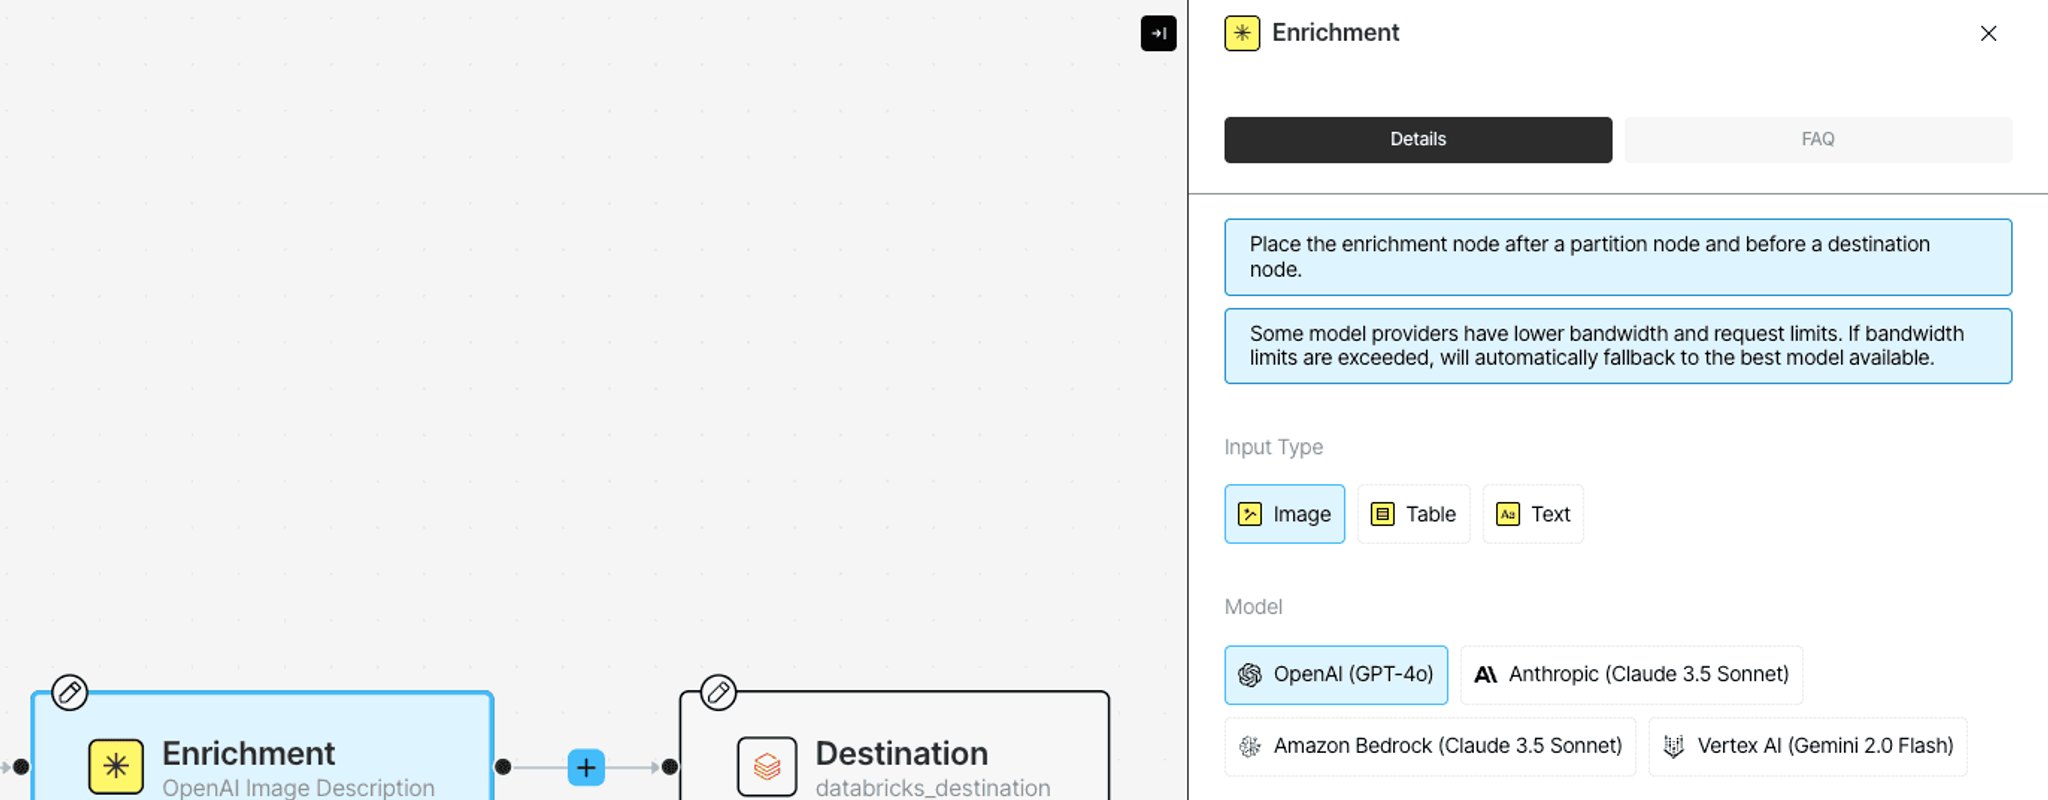
Once the data is structured, we can further enrich it. Currently available enrichments include Summarized Descriptions of Images, Tables, and Named Entity Recognition (NER).
Click on the + button after the Partitioner to add any suitable enrichments:
Next, let's add a Chunkernode. This node arranges resulting document elements into manageable “chunks” to stay within the limits of an embedding model and to improve retrieval precision. To add this, click on the + button after the enrichment node, hover over Enrich, pick Chunker and select a strategy on the Details tab per your needs.
Finally, add the Embedder node to generate a vector representation of every chunk, which we will require for search in our downstream application. You can find the Embedder node when you hover over Transform. For this blog, let's use text-embedding-3-small model to generate the embeddings.
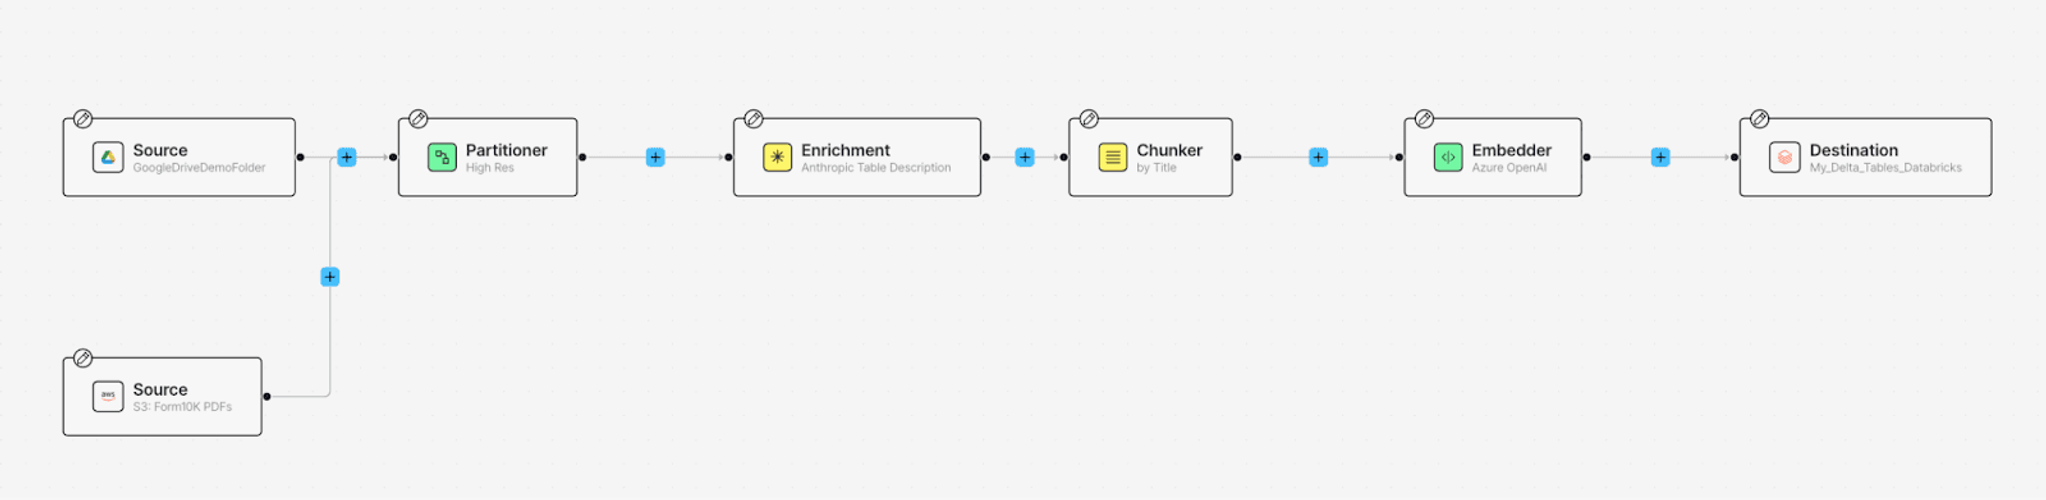
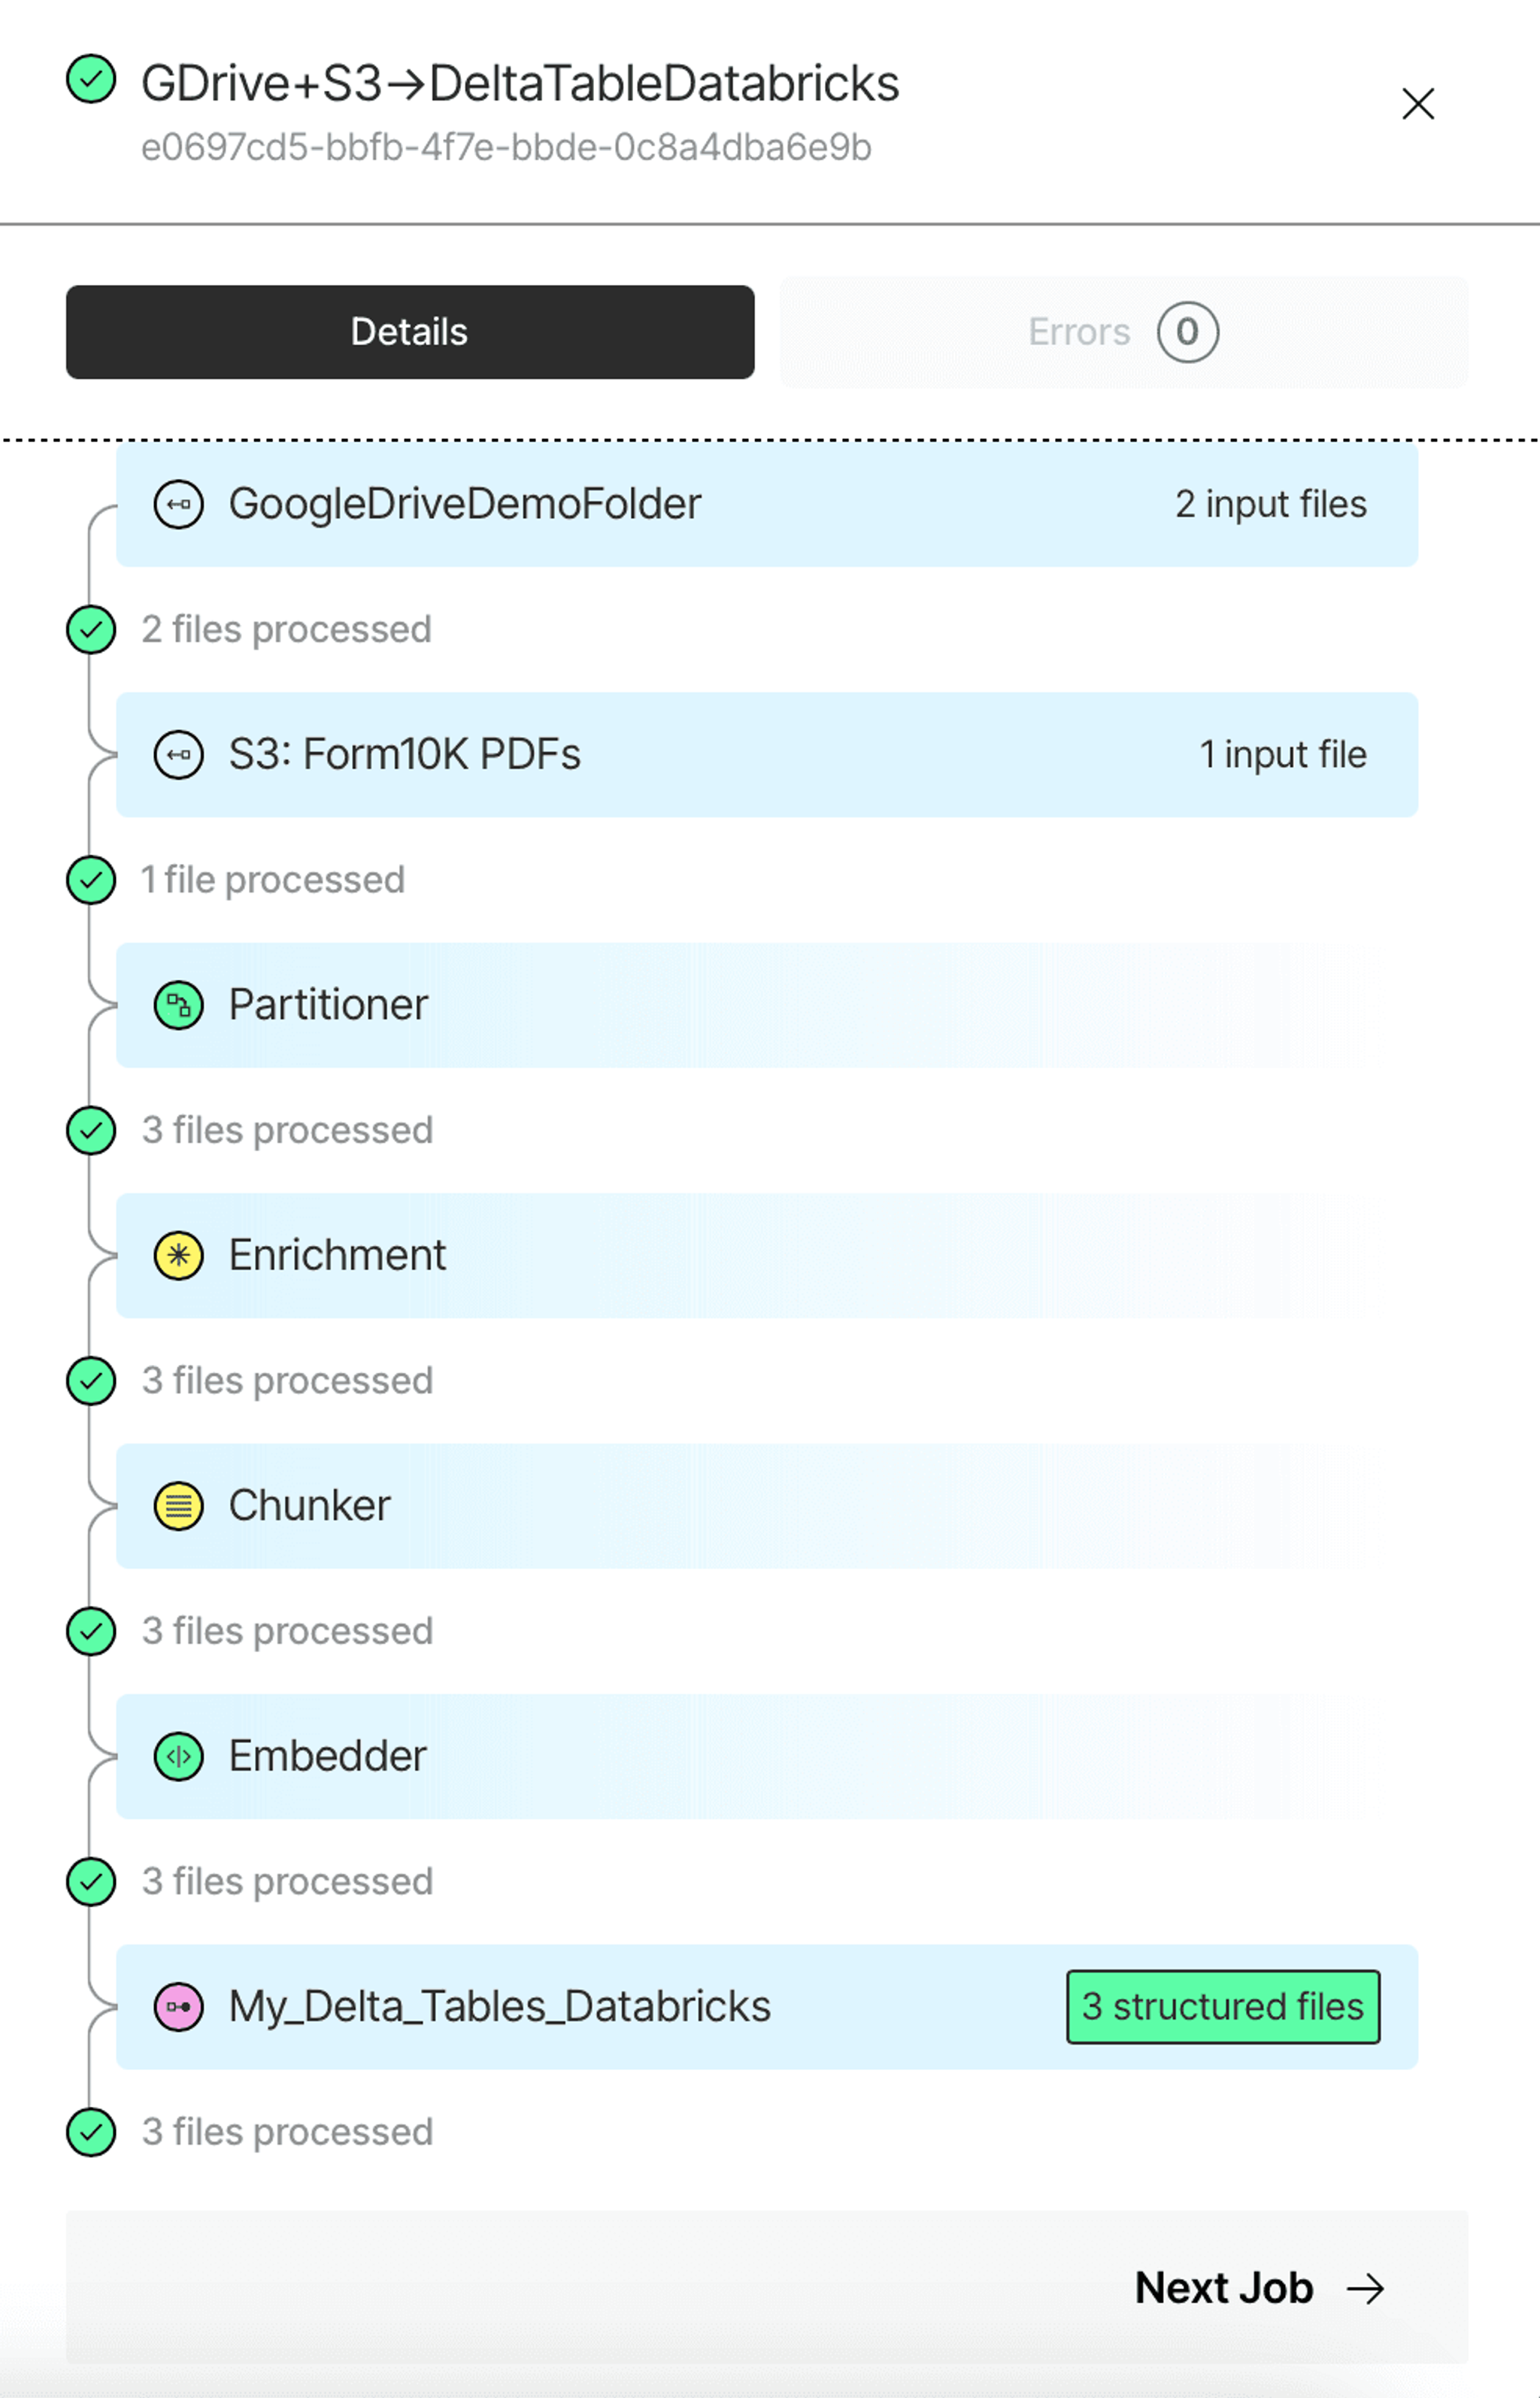
When done, save the workflow, and then hit Run to kick off a job. When the job is finished, you can review all the steps your data went through. If there are any errors, you can learn what caused them on the Errors tab.
If you navigate back to your table in Databricks, you can browse through some sample data. Looking at the data is always a good idea.
If we want to run similarity search over embeddings in this delta table, we now need to set up Databricks Vector Search over the delta table. The next section will guide you though the steps required to do so.
Set up Databricks Vector Search
To use Databricks AI Vector Search in a RAG application, you need the following:
- A vector search endpoint that you can query.
- A vector search index, created from a Delta table.
First, let’s create a vector search endpoint. You can do so in UI:
- In the left sidebar, click Compute.
- Click the Vector Search tab and click Create. Then give your endpoint a name and confirm.

Next, we need to create a vector search from your Delta table. Before you can do this, make sure that your table has the Change Data Feed enabled. By default, it is not. You can change that by running the following line in the SQL Editor. If needed, update the line to <your_catalog>.<your_schema>.elements:
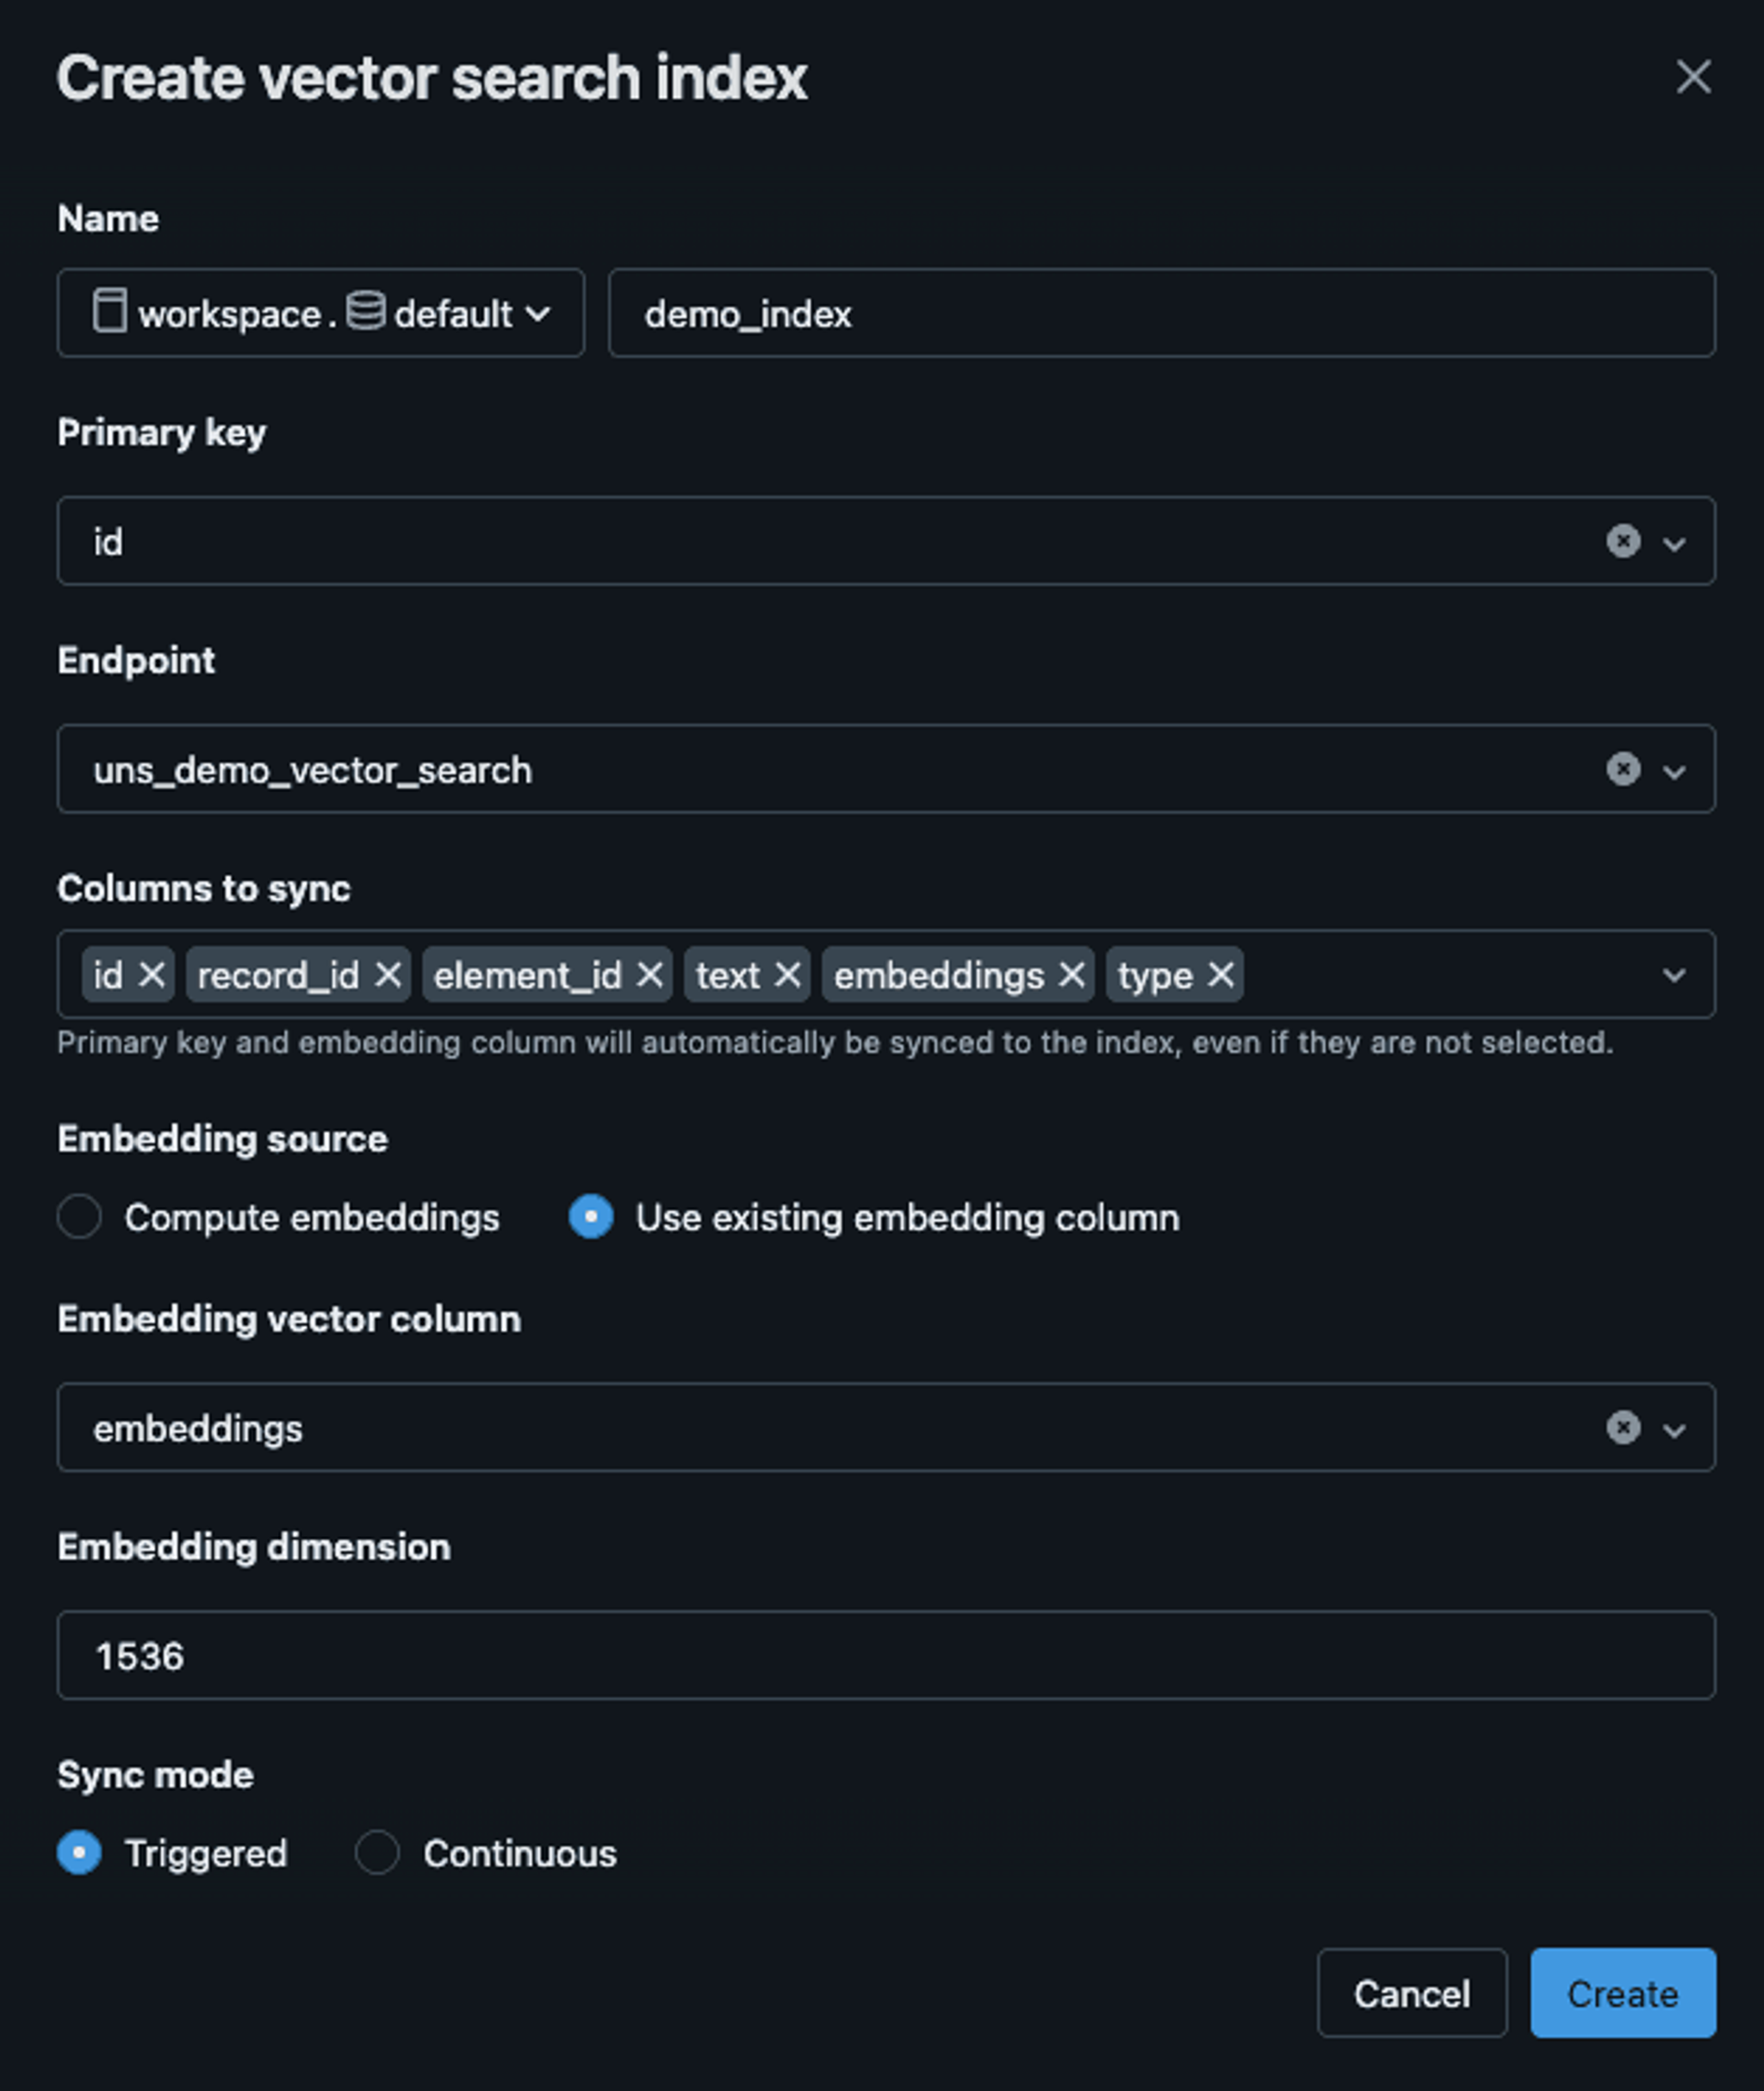
Now, navigate to your table, and click Create | Vector search index:
Fill out the fields in the dialog that opens. Since we’ve already generated the embeddings during data preprocessing, choose the Use existing embedding column option. The embeddings column is called embeddings, and the text-embedding-3-small model that we used produces vectors with embedding dimension of 1536:
When done, wait a few moments for the data to get indexed. Now, we can build RAG!
Build RAG with Databricks Vector Search
Find the full example in this Google Colab notebook. Let’s walk step by step through building RAG with Databricks Vector Search.
First, you need to install the necessary libraries:
Set your environment variables: OPENAI_API_KEY, DATABRICKS_HOST, DATABRICKS_TOKEN.
To embed the user query, use the same embedding model that was used to generate embedding vectors in the vector search index. In this case, it's text-embedding-3-small from OpenAI.
Create a LangChain vector store.
Set up this vector store as a retriever:
Finally, build a RAG application.
First, we'll create a function that generates an answer given a question and retrieved documents:
Next, we'll create a helper function that will format the retrieved documents:
Bring everything together:
1) Given query, invoke the retriever and get the documents
2) Pass the formatted documents and the user query to the LLM to generate an answer
Let’s try it out:
Output:
Congratulations on making it this far! You’ve learned how to preprocess data from multiple sources through a single workflow in Unstructured Platform, and how to store the results in a Delta Table in Databricks. You’ve learned how to create Databricks Vector Search over a delta table, and how to use it as a retriever with LangChain.
Now, it's time to put your knowledge into action! Contact us to get onboarded to Unstructured. For enterprises with more complex needs, we offer tailored solutions. Book a session with our engineers to explore how we can optimize Unstructured for your unique use case.