Authors

The context that fuels retrieval‑augmented generation (RAG) workflows and other LLM‑powered agents is scattered all over the place—object stores, internal wikis, Google Drive, Dropbox, Slack, you name it. Wrangling sign‑ins and ingestion pipelines is only half the battle. The source material itself shows up in every format under the sun—PDFs, Word docs, spreadsheets, emails, etc.—which makes pulling it together and prepping it for GenAI projects a tedious task.
The Solution: Unstructured + Snowflake
Unstructured provides a preprocessing layer that connects to common data stores, extracts text + metadata, and outputs structured JSON. In this guide, we’ll wire it up to a folder of mixed documents in an Azure Blob Storage Container, parse them with Unstructured, and write the results to a Snowflake table. From there you can index the table (e.g., with Snowflake’s vector functions) or feed it into your own retrieval stack, all without custom parsers or ETL scripts.
End-to-End Workflow Overview
This is what the final workflow will look like:

PDFs in an Azure Blob Storage Container flow through the Azure Source Connector, get parsed into structured JSON with Claude Sonnet 3.7, are then broken into RAG‑sized segments by Unstructured’s chunker, embedded via OpenAI’s text‑embedding‑3‑small, and then land as rows in Snowflake through the Snowflake Destination Connector. Once scheduled, this end‑to‑end pipeline keeps your Snowflake table continuously up‑to‑date and ready for any downstream workload—no hand‑rolled ETL required.
Prerequisites
Unstructured
To start transforming your data with Unstructured, contact us to get access—or log in if you're already a user.
Azure
Unstructured can ingest documents from a wide variety of data sources, and you can ingest data from more than one source in a single workflow, however, to keep this guide simple, we’ll only use one source - Azure.
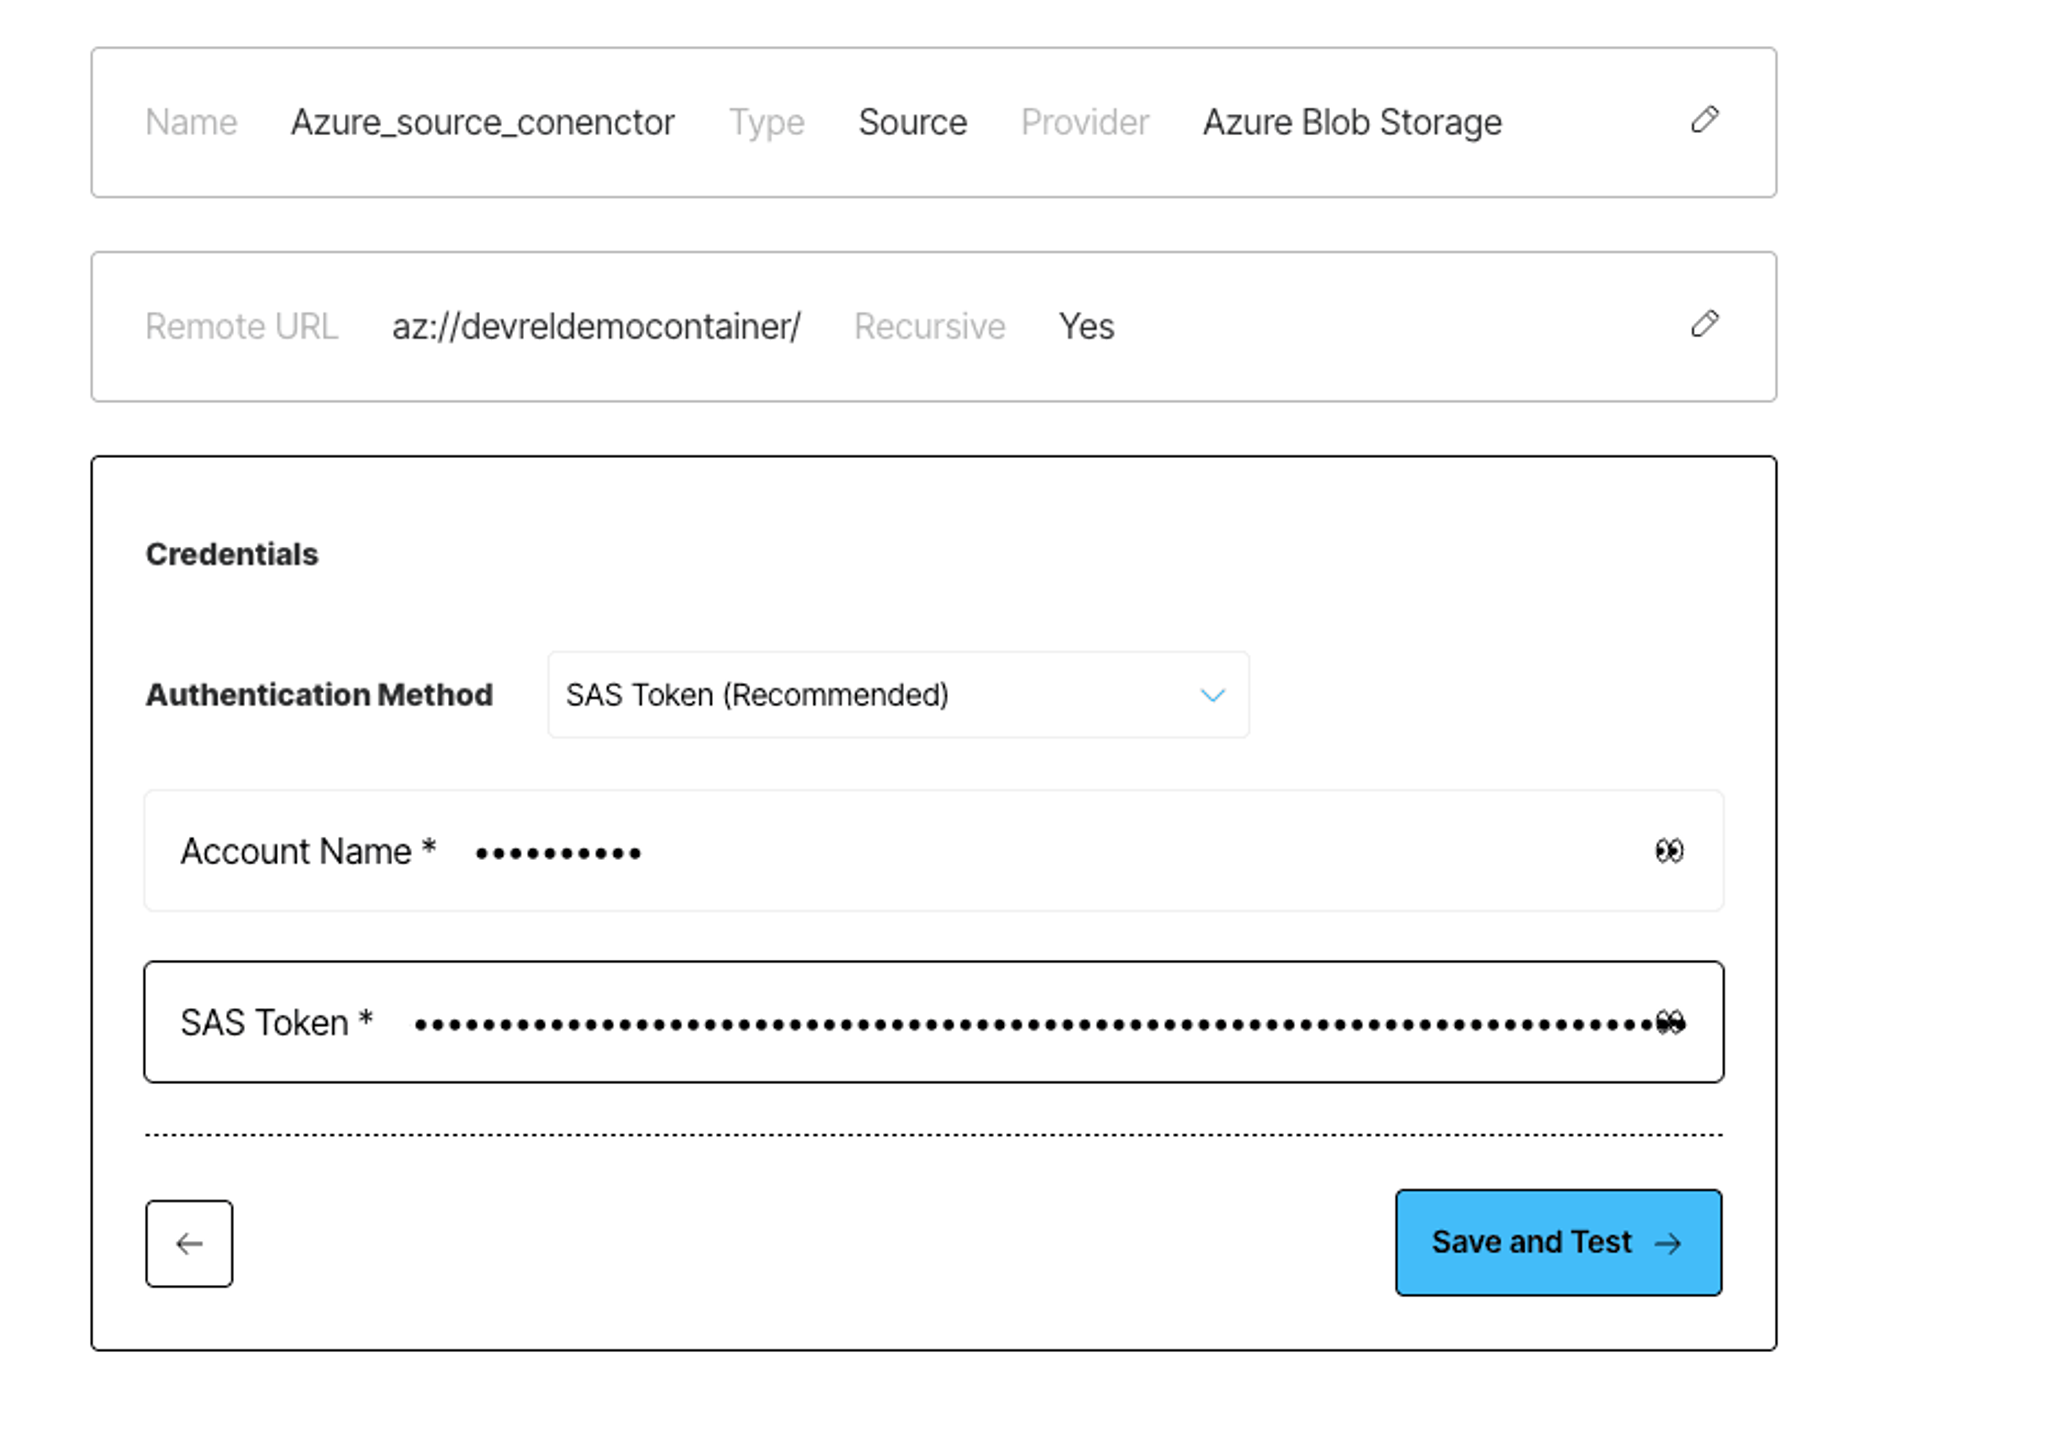
You'll need an Azure account with access to Azure Blob Storage, along with your storage account name and a shared access signature (SAS) token for authentication. Make sure you've created a container within your storage account and that it has the appropriate access permissions. Upload a few files to your blob container so there's something to play with! 😉 Take a look at this list of supported file types and this video on how you can set yours up.
Snowflake
To send processed data from Unstructured to Snowflake, you’ll need:
- Snowflake Account Identifier: Retrieve this by logging into Snowsight, navigating to your username > Account > View account details, and noting the "Account Identifier" field.
- User Credentials: Obtain the login name (not the username) and password for a Snowflake user. To find the login name:
- Log into Snowsight.
- Navigate to Admin > Users & Roles.
- Select the desired user and note the "Login Name" in the About section.
- Role with Appropriate Privileges: Ensure the user has a role with the necessary permissions:
- Database Creation: CREATE DATABASE privilege at the account level and USAGE on the warehouse.
- Schema Creation: USAGE on the database and warehouse, and CREATE SCHEMA on the database.
- Table Creation: USAGE on the database, schema, and warehouse, and CREATE TABLE on the schema.
- Data Insertion: USAGE on the database, schema, and warehouse, and INSERT on the table.
- Data Reading: USAGE on the database, schema, and warehouse, and SELECT on the table.
- Warehouse Hostname and Port: To retrieve this information, execute:
SELECT t.VALUE:type::VARCHAR as type, t.VALUE:host::VARCHAR as host, t.VALUE:port as port
FROM TABLE (FLATTEN (input => PARSE_JSON (SYSTEM$ALLOWLIST ()))) AS t;- Database, Schema, and Table Names: Identify the target database, schema, and table within Snowflake where the processed data will be stored.
- Table Schema: Ensure the target table has a defined schema compatible with Unstructured's output. A recommended schema is:
CREATE TABLE ELEMENTS (
    ID VARCHAR(36) NOT NULL DEFAULT UUID_STRING(),
    RECORD_ID VARCHAR,
    ELEMENT_ID VARCHAR,
    TEXT VARCHAR,
    EMBEDDINGS ARRAY,
    TYPE VARCHAR,
    SYSTEM VARCHAR,
    LAYOUT_WIDTH NUMBER,
    LAYOUT_HEIGHT NUMBER,
    POINTS VARCHAR,
    URL VARCHAR,
    VERSION VARCHAR,
    DATE_CREATED TIMESTAMP_TZ,
    DATE_MODIFIED TIMESTAMP_TZ,
    DATE_PROCESSED TIMESTAMP_TZ,
    PERMISSIONS_DATA VARCHAR,
    RECORD_LOCATOR VARCHAR,
    CATEGORY_DEPTH NUMBER,
    PARENT_ID VARCHAR,
    ATTACHED_FILENAME VARCHAR,
    FILETYPE VARCHAR,
    LAST_MODIFIED TIMESTAMP_TZ,
    FILE_DIRECTORY VARCHAR,
    FILENAME VARCHAR,
    LANGUAGES ARRAY,
    PAGE_NUMBER VARCHAR,
    LINKS VARCHAR,
    PAGE_NAME VARCHAR,
    LINK_URLS ARRAY,
    LINK_TEXTS ARRAY,
    SENT_FROM ARRAY,
    SENT_TO ARRAY,
    SUBJECT VARCHAR,
    SECTION VARCHAR,
    HEADER_FOOTER_TYPE VARCHAR,
    EMPHASIZED_TEXT_CONTENTS ARRAY,
    EMPHASIZED_TEXT_TAGS ARRAY,
    TEXT_AS_HTML VARCHAR,
    REGEX_METADATA VARCHAR,
    DETECTION_CLASS_PROB NUMBER,
    PRIMARY KEY(ID),
    PARTITIONER_TYPE VARCHAR,
    IS_CONTINUATION BOOLEAN
);
You can retrieve connection details from Snowsight. The detailed information on everything you need to know in order to set up Snowflake to work with Unstructured, including all necessary permissions, is listed in this documentation page. We even included videos to help you get started!
Building the Workflow
Step 1: Create an Azure Source Connector
Log in to your Unstructured account, click Connectors on the left side bar, make sure you have Sources selected, and click New to create a new source connector. Alternatively, use this direct link. Choose Azure, and enter the required info about your bucket.
If you’re not sure how to get the necessary credentials, the Unstructured docs include step-by-step instructions and videos that walk you through configuring your Azure Blob Storage for ingestion and retrieving the credentials you'll need.
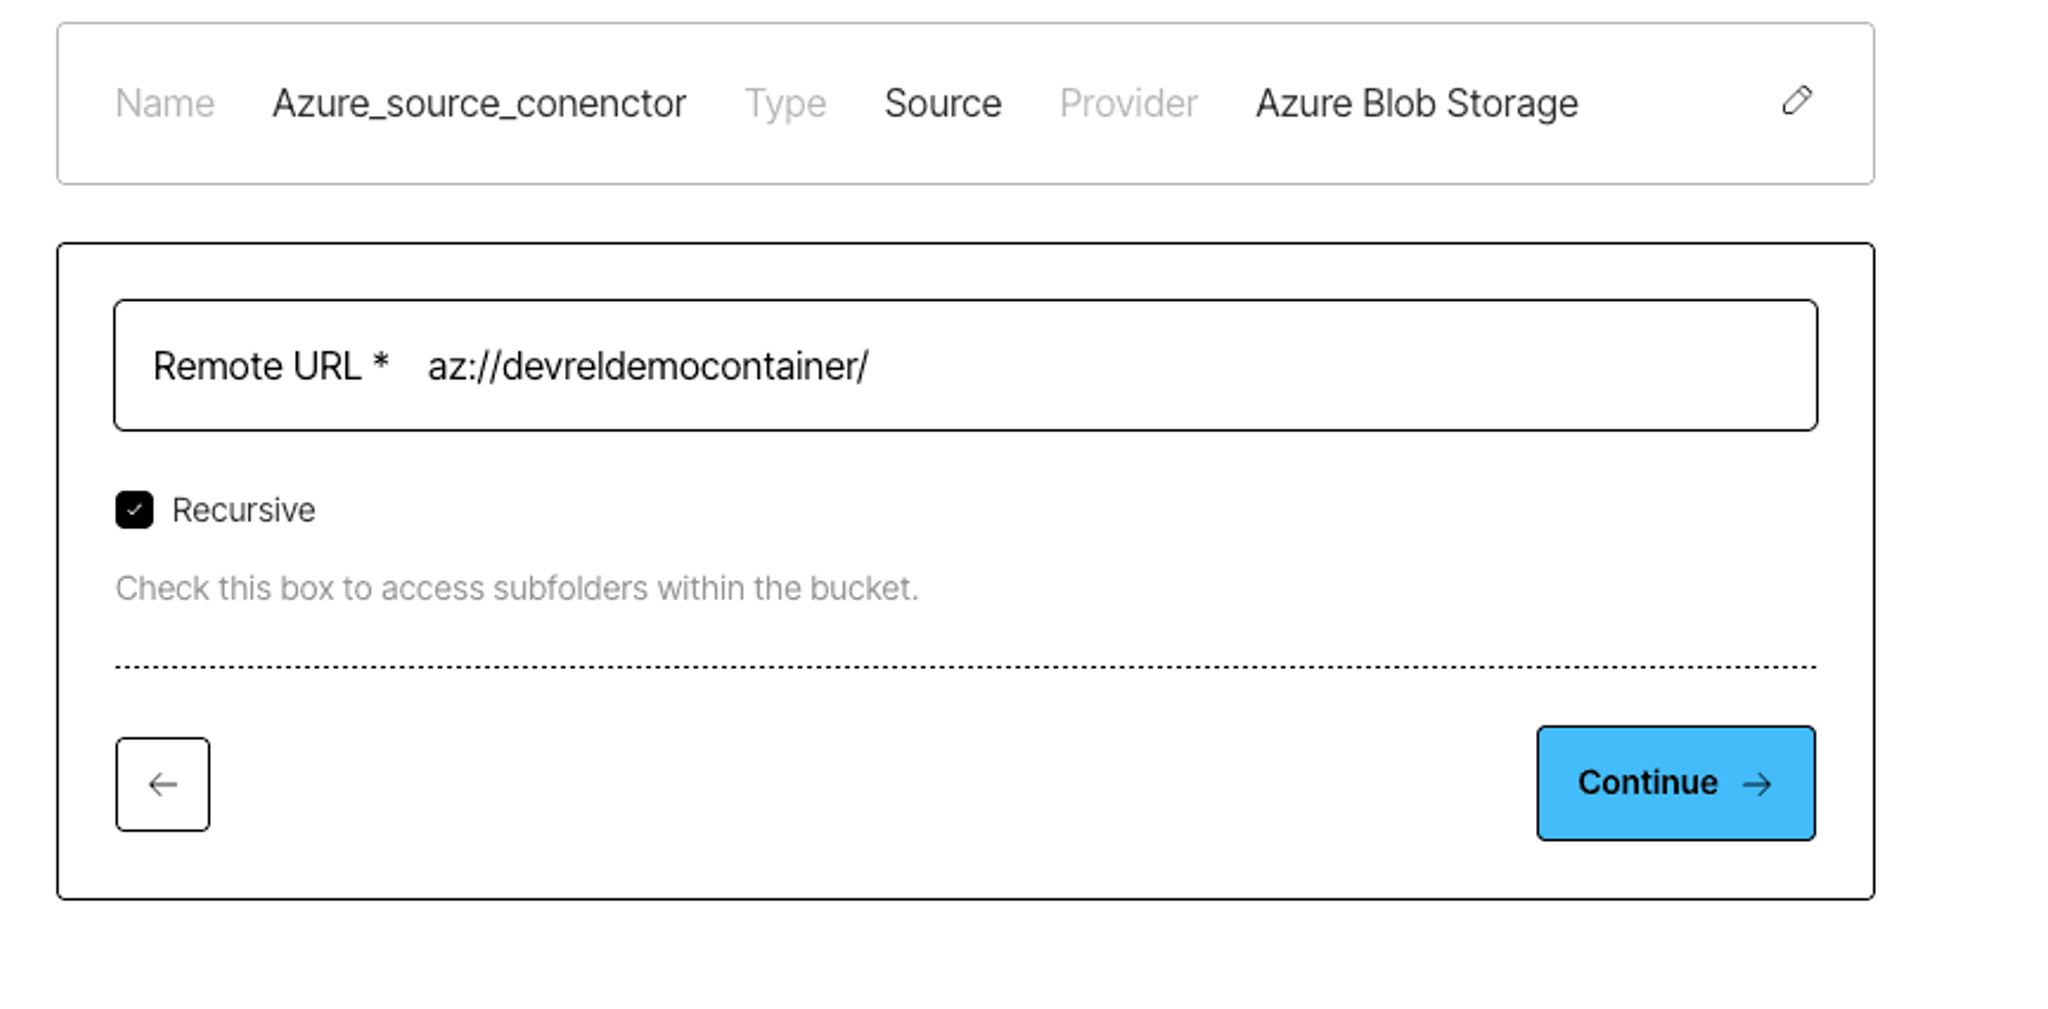
Once the connector is saved, Unstructured will check to make sure it can successfully connect to your container.
Step 2: Create a Snowflake Destination Connector
To create a destination connector, navigate to Connectors in the Unstructured UI, switch to Destinations, and click New; or use this direct link.
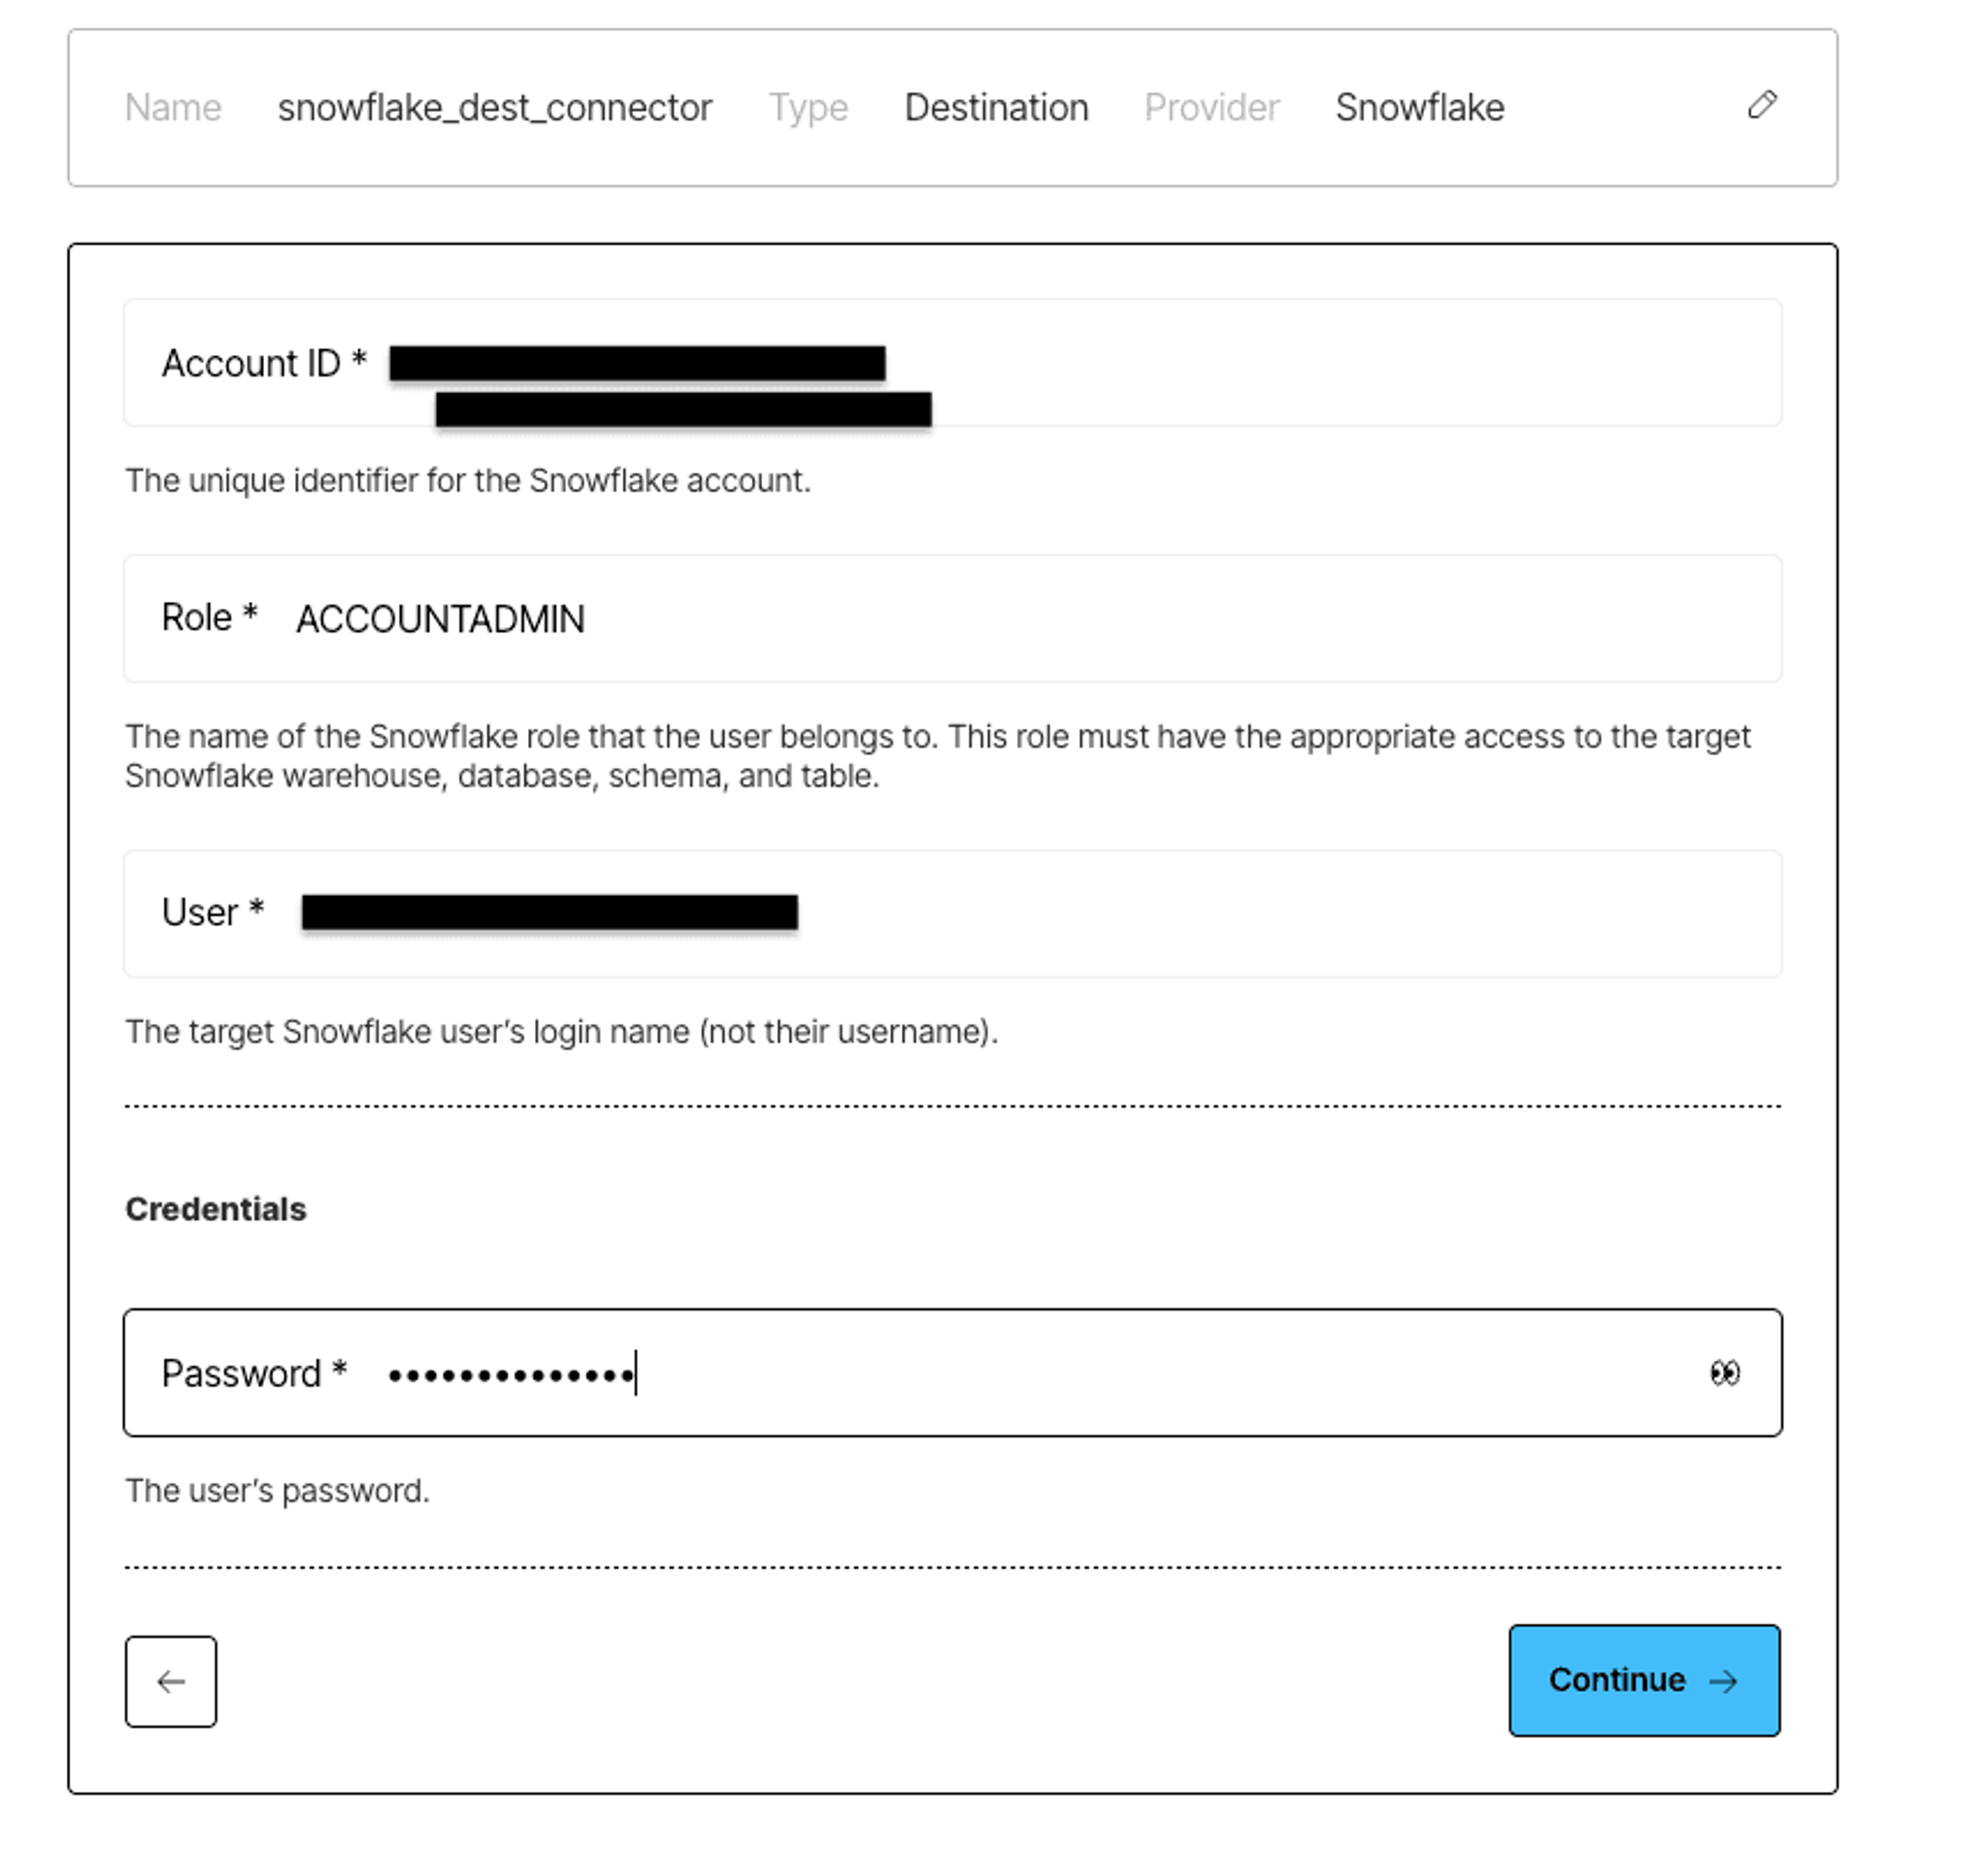
Give your connector a descriptive name, and choose Snowflake as the provider:
Next, enter:
- Account ID – e.g., ABCDEFG-ABC12345
- Role – e.g., DEVREL
- User – your Snowflake login name, not display name
- Password – your Snowflake user password
- Host – e.g., <ID>.<REGION>.azure.snowflakecomputing.com
- Port – typically 443
- Database – e.g., DEVRELDEMO_DB
- Schema – e.g., DEVREL_SCHEMA
- Table – e.g., ELEMENTS
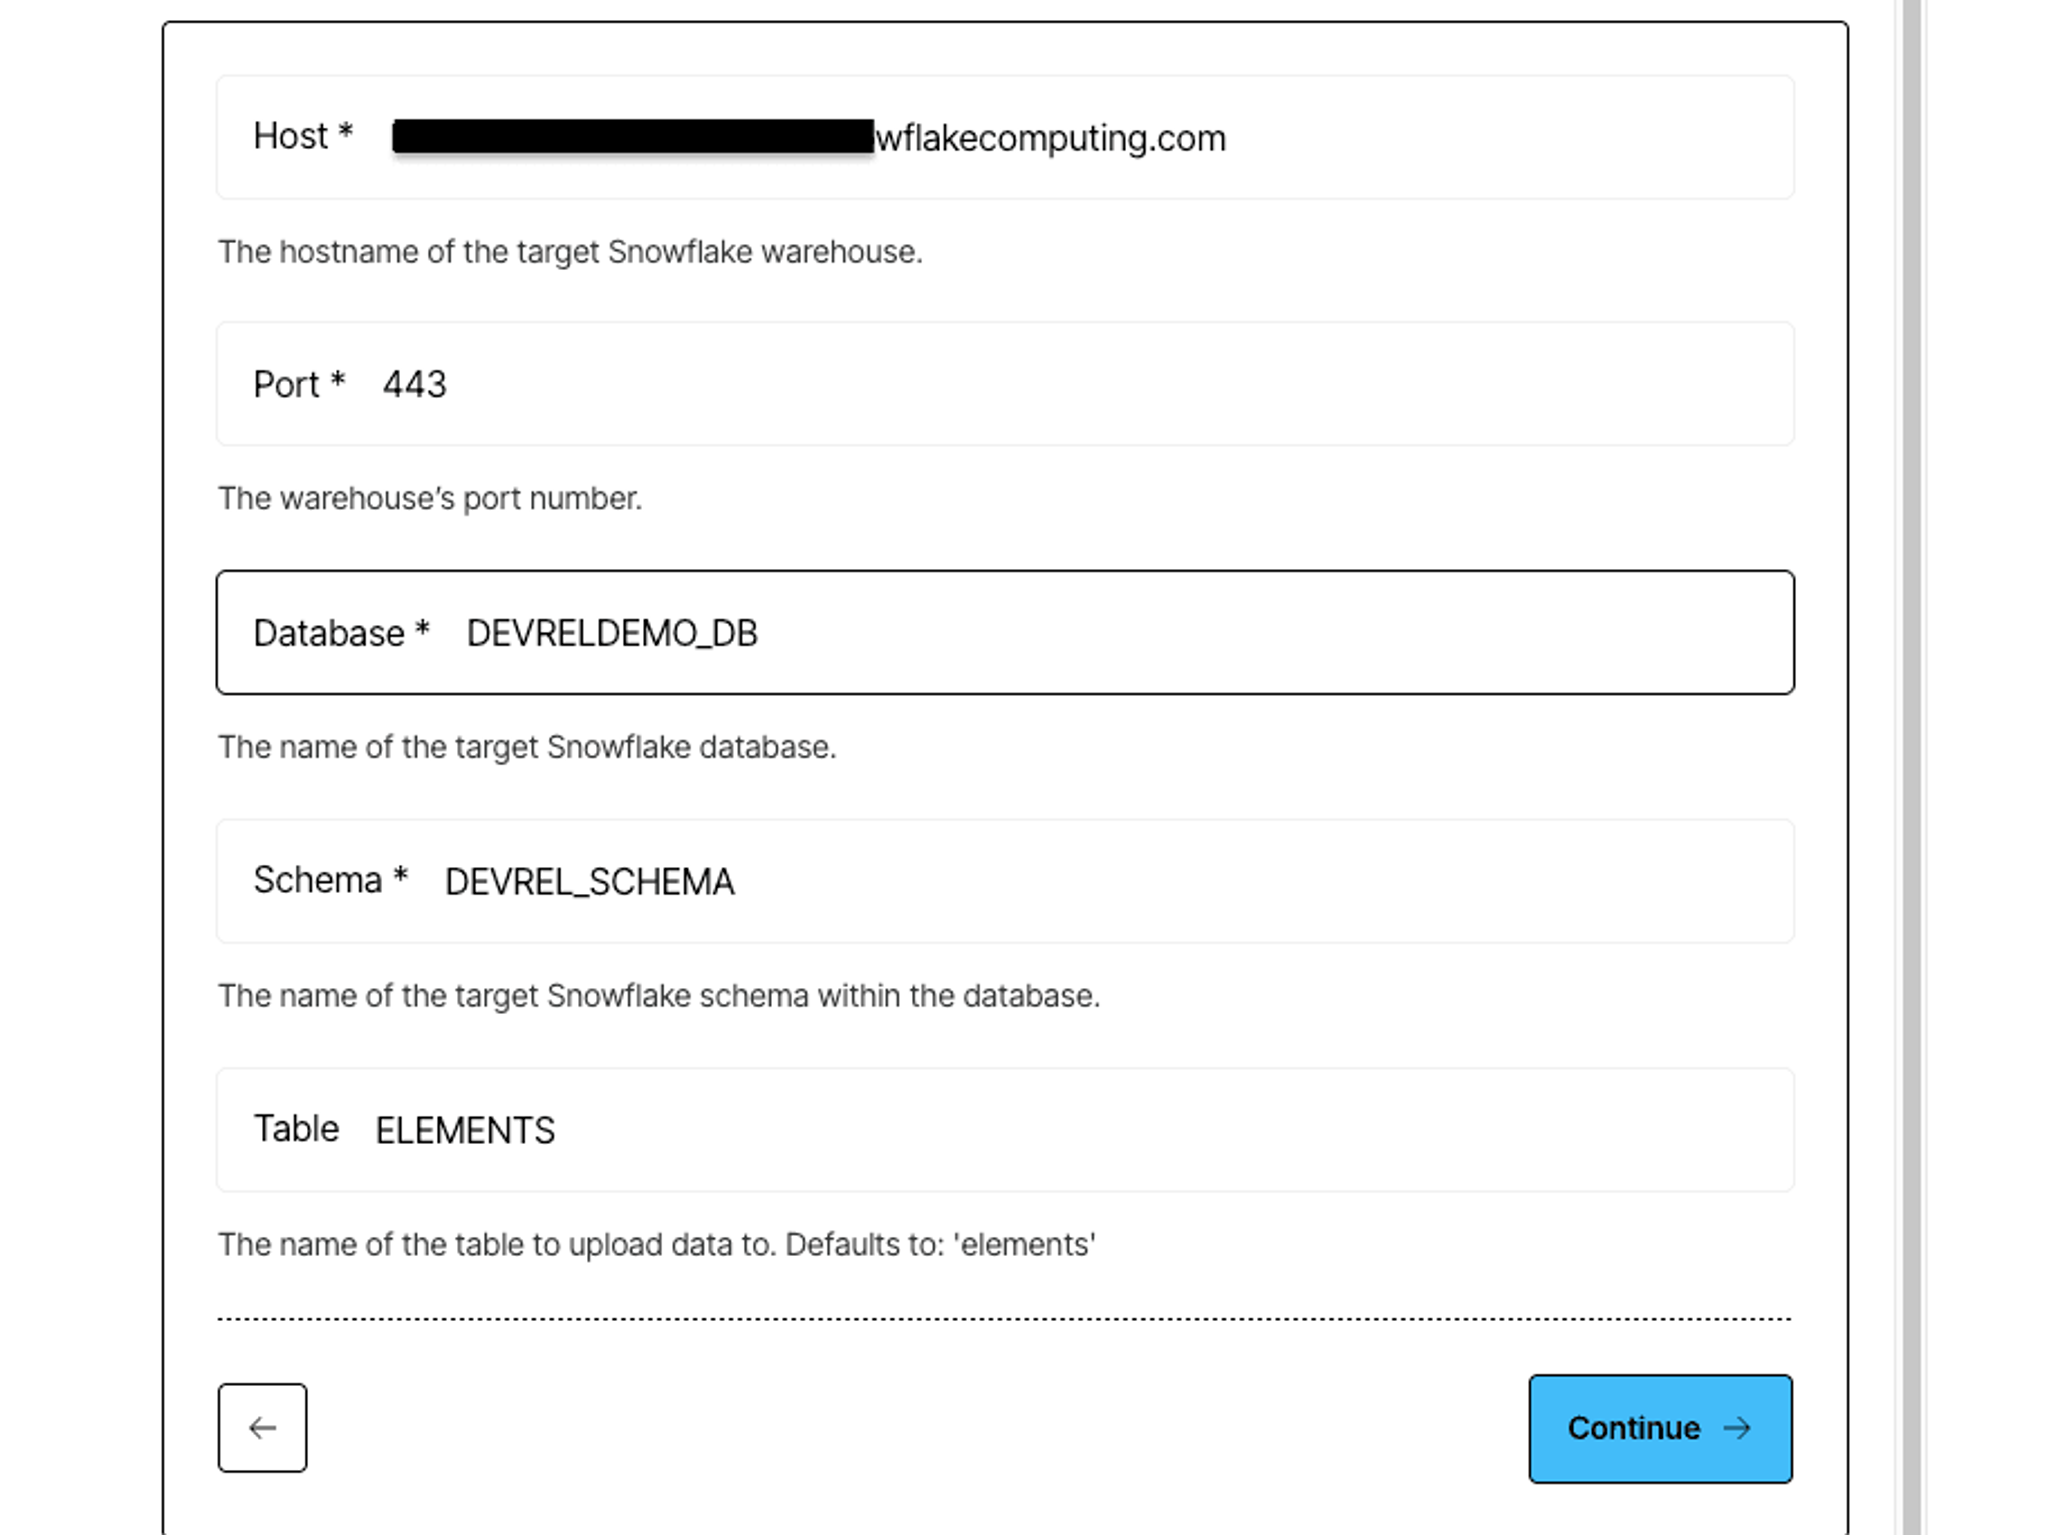
Click Continue to validate the connection and save the destination.
Step 3: Configure Your Processing Workflow
Having a source and a destination connectors are the necessary prerequisites to building a data processing workflow - Unstructured needs to know where to ingest the data from, and where to upload the results of data processing. Now that you have set up the Azure source and the Snowflake destination connectors, you can proceed to the best part - creating a data processing workflow!
Navigate to the Workflows tab in Unstructured, and click New Workflow. Choose the Build it Myself option and continue. Your workflow DAG starts with the three essential components: Source, Partitioner, and Destination.
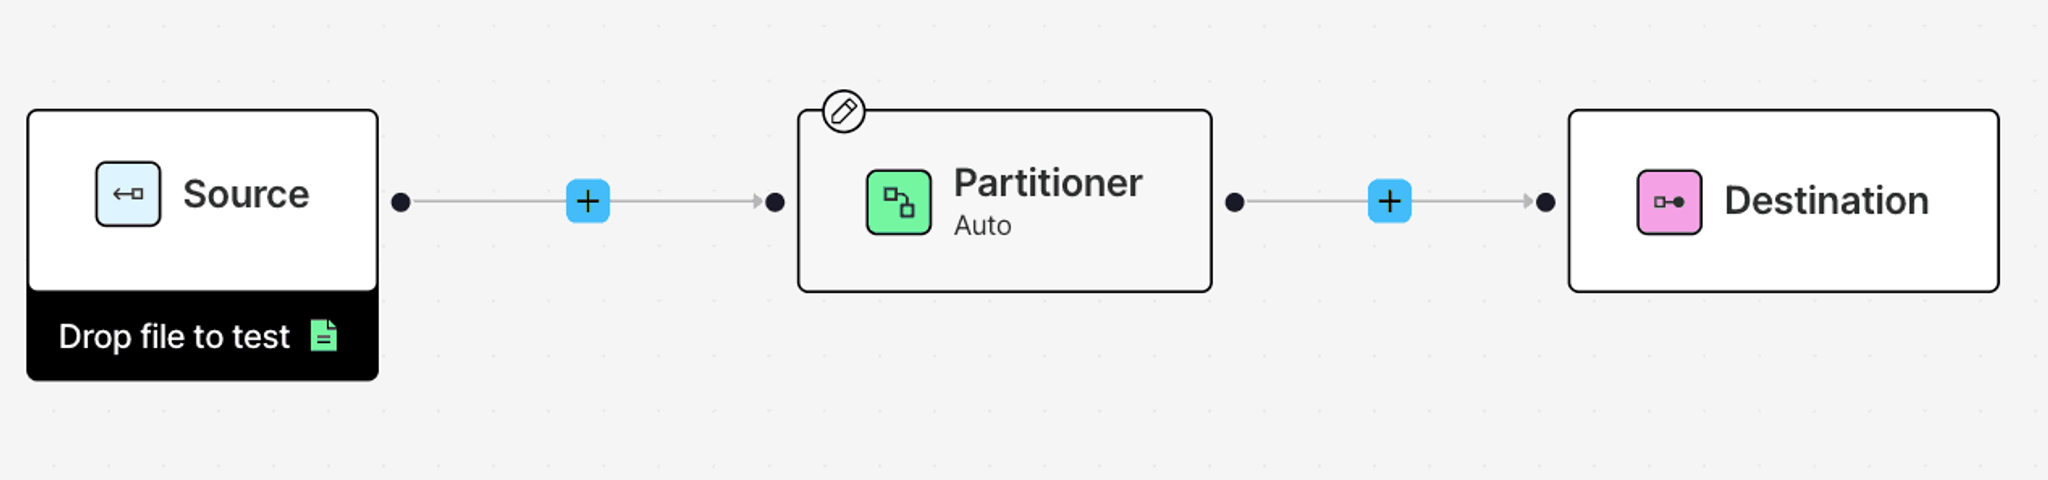
Click on the DAG nodes for the Source and Destination and select your Azure and Snowflake connectors.
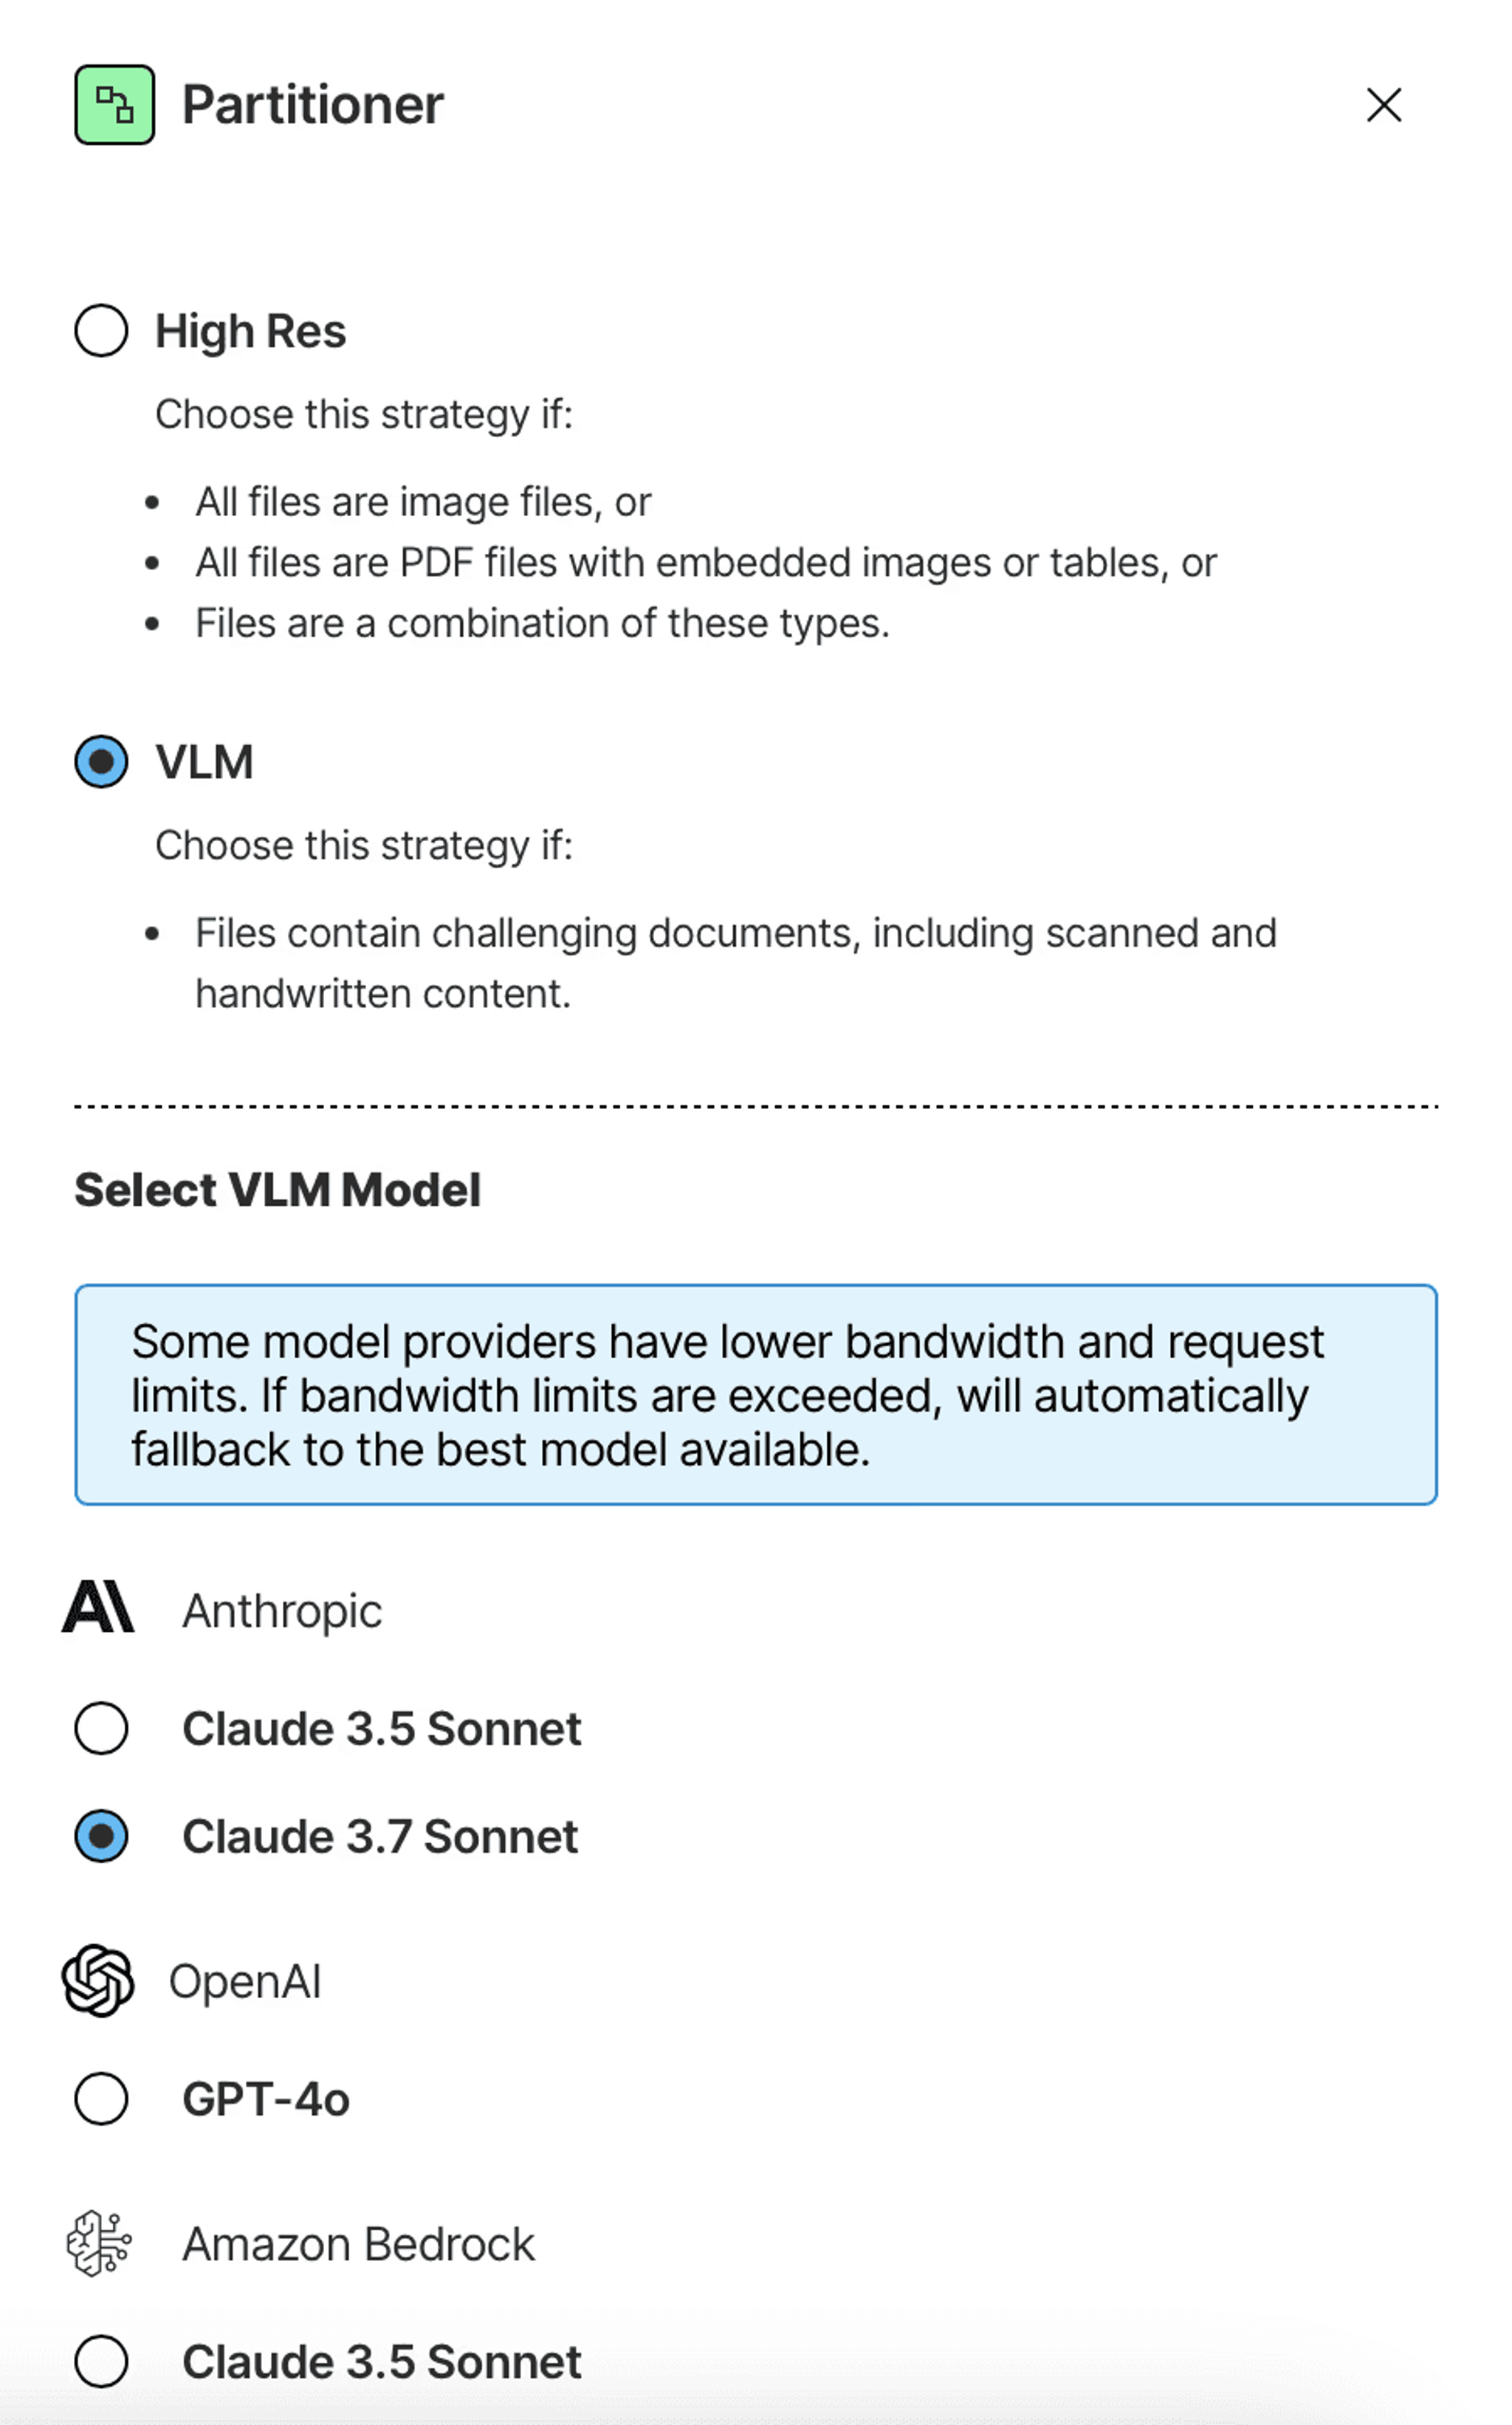
A Partitioner is a required node in any workflow. This step transforms your unstructured data into structured JSON format using one of the available partitioning strategies:
- VLM: A partitioning strategy that uses state-of-the-art VLMs (Vision-Language Models) to extract content from complex documents where traditional OCR struggles. It's ideal for challenging cases like noisy scans, handwriting, and complex nested forms.
- High Res: This approach combines advanced OCR with document understanding capabilities, making it effective for image-based documents like scanned files. Can handle documents with images and simple tables.
- Fast: A rapid strategy optimized for quick text extraction from documents such as markdown or office suite files. It's a cost-effective solution for documents with easily extractable text and no images.
- Auto (default): A dynamic meta-strategy that selects the optimal partitioning approach—either VLM, High Res, or Fast—based on a document's unique characteristics, such as file type and page content. This strategy intelligently applies the most suitable method to minimize processing costs while maximizing accuracy.
For this guide, we’ll opt for the VLM partitioner. You can choose a model you want to be used to transform the documents, for example Claude Sonnet 3.7:
Click on the plus buttons between the nodes to explore what other data transformations you can add to your DAG. Unstructured offers chunking nodes, embedding nodes, and a set of data enrichment transformations.
To complete a simple data transformation pipeline for a RAG application, we’ll add a Chunker node, and an Embedder node:

The documents coming out of the Partitioner node are structured as JSON containing so-called document elements. Document elements have a type, e.g. NarrativeText, Title, or Table, they contain the extracted text, and metadata that Unstructured was able to obtain.
Elements can be large pieces of text, such as a lengthy paragraph or a large table, or can be small, like individual list items or headers.
The chunking node in the workflow uses one of the Unstructured’s smart chunking strategies to rearrange the document elements into perfectly sized “chunks” to stay within the limits of an embedding model while incorporating a reasonable amount of context - all to improve retrieval precision. You can learn more about chunking here.
Finally, the Embedder node uses an embedding model of your choice to generate a vector representation (embedding) of every chunk, which you need for similarity search downstream.
If no particular node in the DAG is selected, you can find general workflow setting to modify in the right panel, such as:
- Workflow name
- Schedule
- Whether all documents need to be reprocessed each time the workflow is triggered, or only new ones
Give your workflow a name, choose a schedule, and save! And just like that, you have a full working data processing workflow to prepare all of your data. On the Workflows page, set your workflow as Active and click Run to trigger a job that will execute your workflow.
Step 4: Track Job Progress
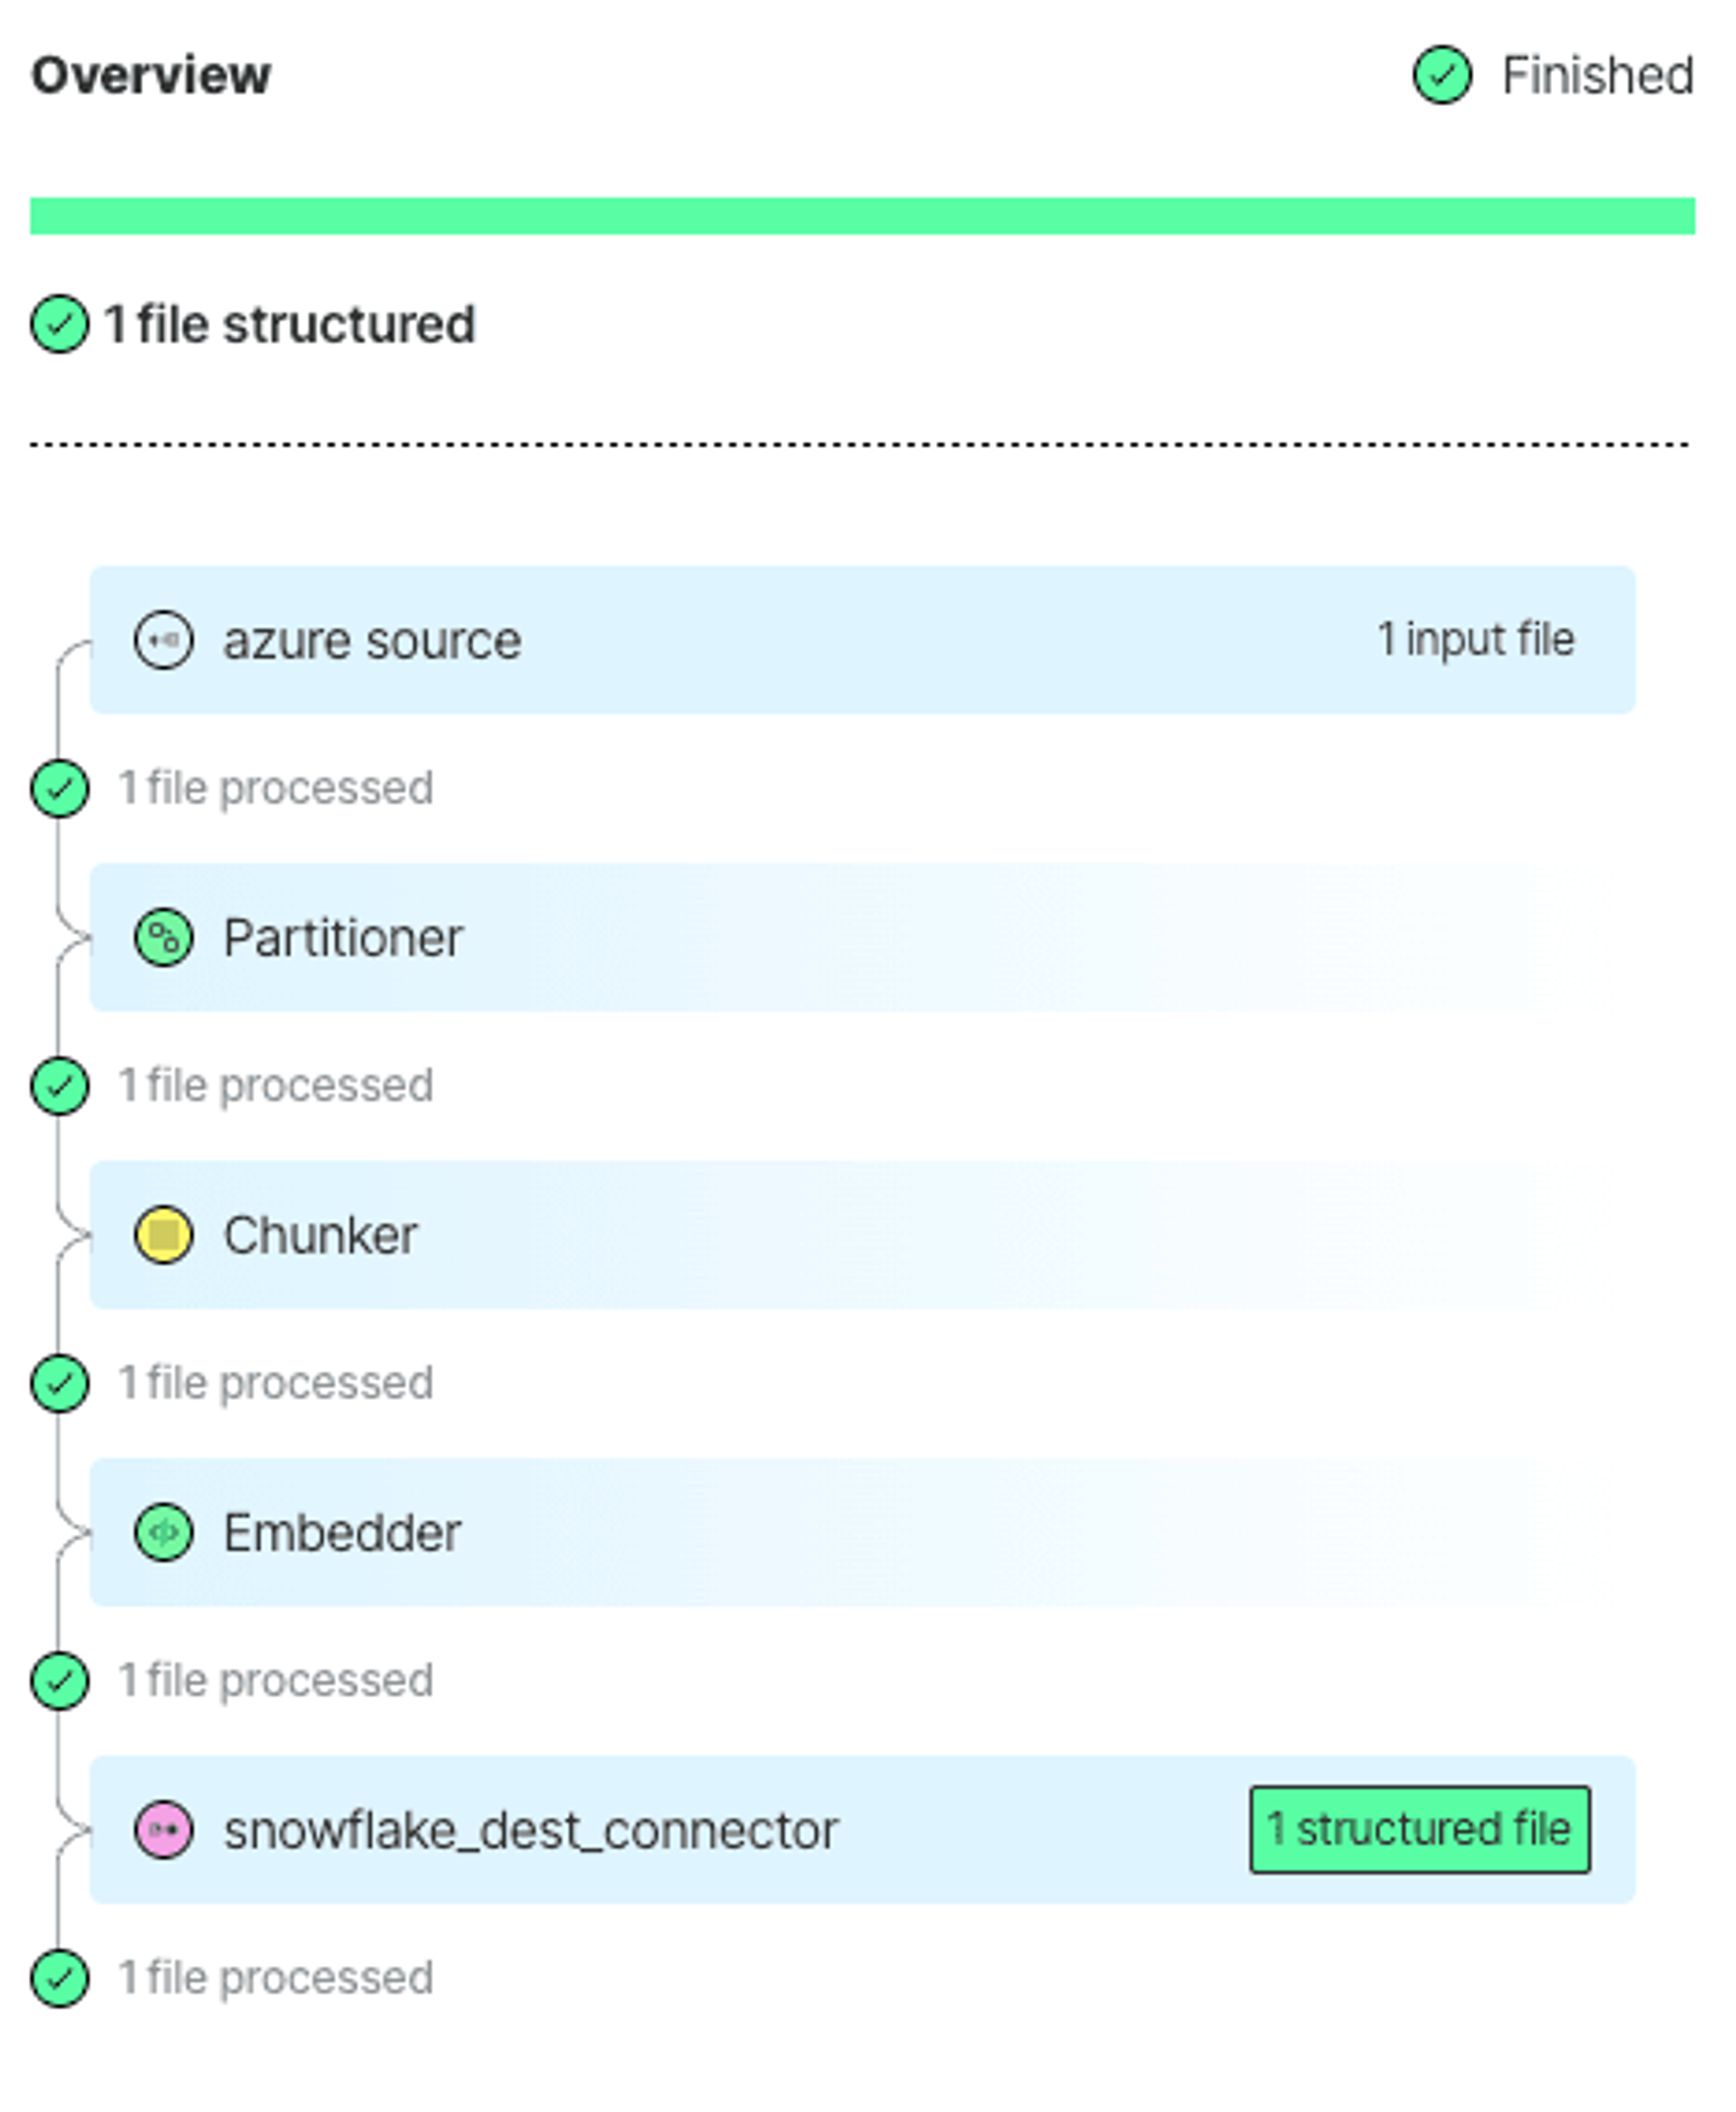
Navigate to the Jobs tab to track the progress. Here you can click on your jobs to explore what they are doing. Once the job completes, you’ll find the details here, including error logs, if any:
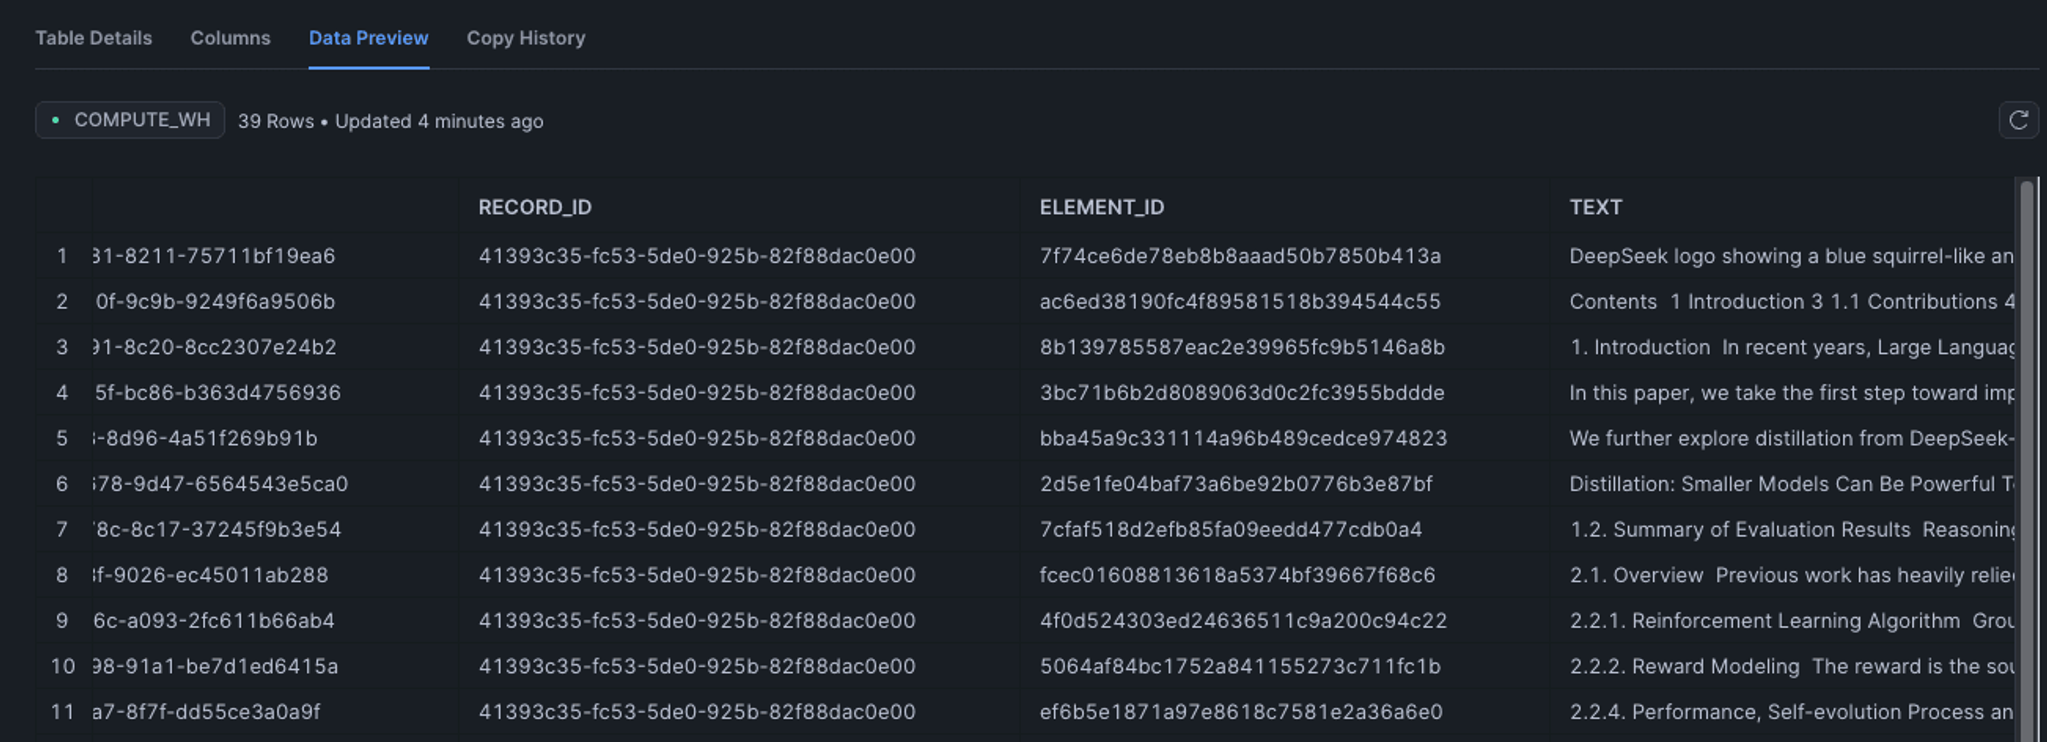
View Your Processed Data in your Table
Once the job is completed, your data is processed, and you can find it in your catalog under the schema you've specified.
Conclusion
And there you have it! You have set up a complete data processing workflow with Unstructured Platform. You've learned how to pull documents from your Azure Blob Storage Container, transform them into structured JSON, create vector embeddings, and store the results in a Table in Snowflake. With Unstructured’s data processing capabilities, your previously unstructured data is now ready to power your RAG applications, or supply context to your LLM agents.
Ready to put your knowledge into action? Contact us to get onboarded to Unstructured. For enterprises with more complex needs, we offer tailored solutions. Book a session with our engineers to explore how we can optimize Unstructured for your unique use case.